You finish a refreshing swim, eager to check your workout stats—only to find your Apple Watch completely dead. No tap, no chime, no Apple logo. The screen stays black, and no amount of button pressing brings it back. It’s a frustratingly common scenario, especially among regular swimmers. Despite Apple marketing the Apple Watch as ideal for swim tracking, countless users report their device failing after a pool or open-water session—sometimes on the very first use. Whether you own a Series 3, SE, Series 10, or even the rugged Ultra model, your watch can fall victim to water ingress, corrosion, and sudden failure. The worst part? Apple typically won’t cover this under warranty, even if you followed all the rules. This guide walks you through exactly what to do when your Apple Watch won’t turn on after swimming, how to potentially revive it, your repair options, and how to protect your next device.
Immediate Steps After Failure
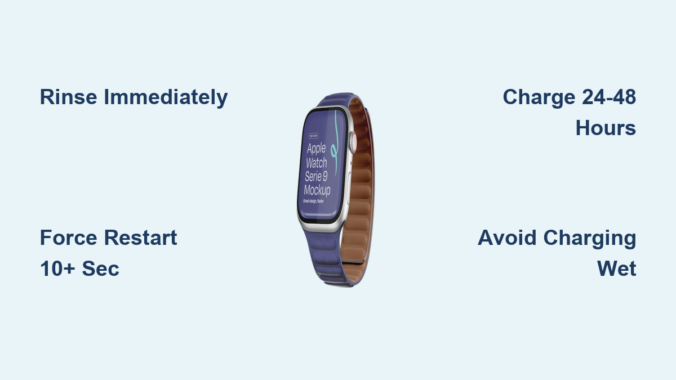
Rinse and Dry Before Charging
The moment you notice your Apple Watch is unresponsive post-swim, do not plug it in. Charging a wet device risks short-circuiting the logic board. Instead, act fast:
- Rinse under fresh, running water for 10–15 seconds to flush out chlorine, salt, or chemicals.
- Wipe gently with a soft, lint-free cloth—never paper towels or rough fabrics.
- Shake lightly to dislodge water from the speaker and mic grilles.
- Avoid rice, heat, or compressed air—these can do more harm than good.
Pro Tip: Even if the screen is off, rinse it. Residue from pool chemicals accelerates internal corrosion.
Wait until the exterior is completely dry before attempting to charge or restart. Rushing this step is one of the most common reasons for permanent damage.
Avoid These Common Mistakes
- ❌ Don’t place in rice—it doesn’t absorb internal moisture and can introduce dust into ports.
- ❌ Don’t use a hairdryer—hot air can warp seals and push moisture deeper.
- ❌ Don’t charge while damp—this can fry the motherboard instantly.
Patience is critical. Let the watch air dry for at least 30 minutes before moving to the next step.
Force Restart Your Apple Watch
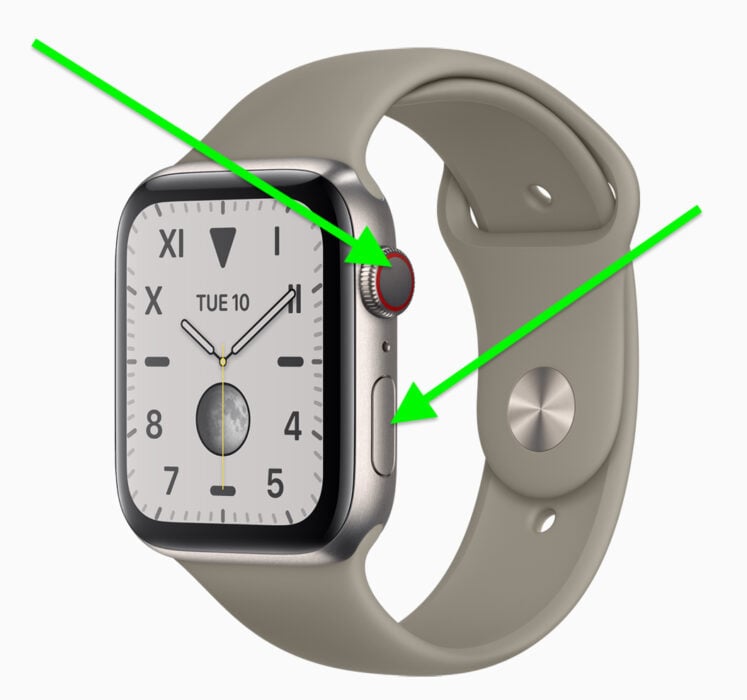
Hold Buttons for 10+ Seconds
A force restart can often revive a frozen or unresponsive Apple Watch, even if the screen appears dead.
Steps:
1. Press and hold the side button and Digital Crown at the same time.
2. Keep holding for at least 10 seconds—don’t release early.
3. Release when you see the Apple logo.
Note: Some users report success only after the third or fourth attempt. Persistence pays off.
When the Restart Fails
If nothing happens:
– Try while the watch is on the charger—some units only respond when powered.
– Ensure the charger is clean and magnetically aligned.
– Wait 15–30 minutes after charging before trying again.
Some watches need time to build enough charge to power on, even if the screen stays dark.
Charge for 24–48 Hours
Extended Charging May Save It
Even with a black screen, the battery could be deeply drained or moisture might be blocking the charging circuit.
What to do:
– Place the watch on its magnetic charger.
– Leave it connected for 8 to 48 hours.
– Do not unplug to check—continuous charging creates gentle heat that helps evaporate trapped moisture.
User Success: One Series 7 owner revived their watch after 36 hours of uninterrupted charging.
Look for Signs of Life
Watch for subtle clues:
– A haptic tap when placed on the charger.
– Siri’s voice saying “Charging” or “Battery nearly full.”
– A red lightning bolt icon (indicates extremely low battery).
If you feel or hear anything, keep it charging. The display may take hours to respond.
Unpair and Re-pair the Watch
Reset the Connection to Fix Bootloops
If your Apple Watch is stuck on the Apple logo or keeps rebooting, software corruption could be the culprit.
Steps:
1. Open the Apple Watch app on your iPhone.
2. Go to My Watch > All Watches.
3. Tap the info button (i) next to your watch.
4. Select Unpair Apple Watch.
5. Confirm—your data is backed up automatically.
6. After unpairing, re-pair and restore from backup.
Best for: Devices that show signs of life but won’t fully boot.
This clears firmware glitches and resets the pairing, often resolving boot issues caused by water-related electrical interference.
Diagnose Hidden Water Damage
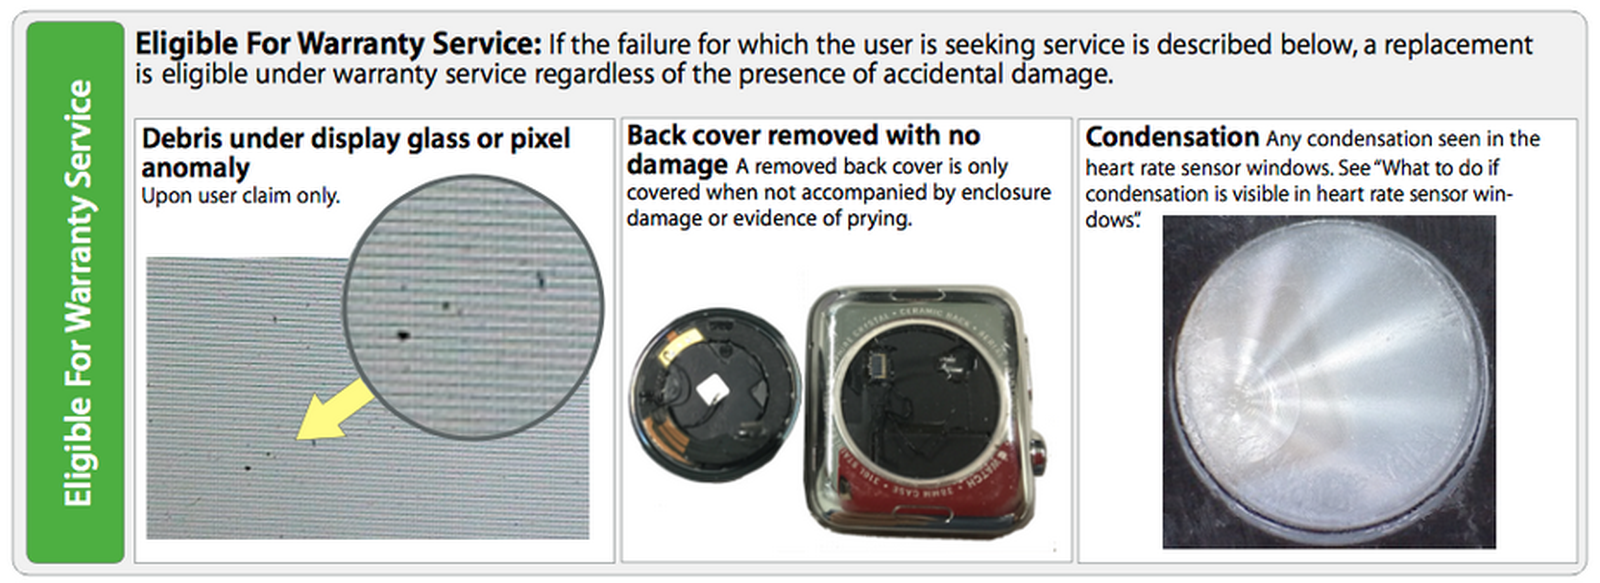
Check for Internal Corrosion Signs
Apple Watches have liquid contact indicators (LCIs) inside, but you can’t see them without opening the device. Instead, watch for symptoms:
- Persistent red lightning bolt even after charging.
- Overheating during charging.
- Random SOS activation mid-swim.
- Flickering display that dies quickly.
These point to internal corrosion, especially around the battery and display connectors.
Why Water Gets In—Even on Water-Resistant Models
Despite 50m (WR50) or 100m (Ultra) ratings:
– Seals degrade with age, heat, and chemical exposure.
– Water enters through speaker, mic, or Digital Crown ports.
– Chlorine and saltwater break down seals faster than fresh water.
– Water Lock does not prevent ingress—it only locks the screen and helps expel water after a swim.
Technician Insight: “Nearly all failed swim watches show corrosion on the battery connector.” (murtaza1403)
Repair Options: Apple vs. Third Party

Apple Service: No Water Damage Coverage
Apple does not cover liquid damage under standard warranty—even if you were swimming within guidelines.
What happens:
– Apple runs diagnostics for water damage.
– If detected, no repair is done—even under warranty.
– Out-of-warranty? You may pay a diagnostic fee (up to $200).
– Replacement cost: $300–$700, depending on model.
User Warning: “They’ll return it unrepaired and charge half the price of a new watch.” (uservpn)
AppleCare+ Is Your Best Bet
If you have AppleCare+, water damage is covered—with a service fee:
– $69–$79 USD per incident.
– You get a refurbished replacement.
– Limited to two accidental damage events.
Pro Tip: If you swim weekly, AppleCare+ is non-negotiable. It’s the only way to avoid full replacement costs.
Third-Party Repair Shops Can Save Money
Independent shops can often repair rather than replace:
– Open the device and clean corrosion with isopropyl alcohol.
– Replace damaged parts: battery, flex cables, speaker.
– Cost: $80–$150, far below Apple’s price.
Risk: No warranty, and improper resealing may cause future failures.
DIY Repair for Advanced Users
Tools You’ll Need
- iOpener or heat gun
- Plastic pry tools
- 90%+ isopropyl alcohol
- Replacement OCA film
- Replacement battery or flex cables (if damaged)
Step-by-Step Recovery
- Apply heat to soften the display adhesive.
- Lift the display using a suction cup and pry tool.
- Disconnect all flex cables (battery, display, Taptic Engine).
- Inspect for corrosion—white or green residue on connectors.
- Clean with alcohol and cotton swabs.
- Replace damaged components if needed.
- Reassemble with new adhesive.
Key Finding: The charging port often survives—meaning the motherboard may still work.
When to Attempt DIY
Only try this if:
– The watch is out of warranty.
– You have technical experience.
– You accept the risk of permanent damage.
Prevent Future Swim Failures
Rinse and Dry Every Single Time
After every swim, even in a pool:
– Rinse under fresh water for 10–15 seconds.
– Dry with a soft cloth.
– Turn off Water Lock to eject water (watch vibrates and beeps).
Critical: Salt and chlorine eat away at seals—rinsing extends life.
Enable Water Lock Before Swimming
Swipe up > Tap Water Lock before jumping in. It:
– Locks the screen to prevent accidental touches.
– Helps expel water from the speaker after swim.
But remember: Water Lock is not a waterproof seal.
Avoid Heat and Chemicals
- ❌ No hot showers, saunas, or steam rooms—heat weakens seals.
- ❌ No soaps, shampoos, or lotions—they degrade water resistance.
- ❌ No deep dives beyond 50m—even Ultra models aren’t for scuba.
Don’t Admit Water Damage at Apple Store
Strategic Replacement Hack
Many users report getting free replacements by not mentioning water.
What to say:
– “It randomly died during a workout.”
– “It stopped responding after a run.”
– “It won’t turn on—no idea why.”
User Success: “Took it in, didn’t say ‘swim.’ Got a brand new one.” (Bariscukur14)
Do not say:
– “I was swimming.”
– “It got wet.”
– “I used it in the pool.”
Apple’s diagnostics may detect moisture, but if you don’t admit it, they may replace it under warranty as a “hardware failure.”
Is This an Apple Design Flaw?
Evidence Suggests Yes
- Failures occur across all models—SE, Series 3–10, Ultra.
- Happens on first swim with brand-new devices.
- Water Lock enabled in many cases.
- Internal corrosion confirmed in teardowns.
- Apple promotes swim tracking but denies coverage for water damage.
User Frustration: “How can they market swimming if it kills the watch?” (RGJ7767)
Many swimmers are switching to Garmin, Samsung, or Coros for better durability.
Final Tips to Save Your Apple Watch
Act Fast, Stay Calm
If your Apple Watch won’t turn on after swimming:
1. Rinse and dry—no charging yet.
2. Force restart—hold buttons 10+ seconds.
3. Charge for 24–48 hours—don’t give up early.
4. Unpair and re-pair—fixes bootloops.
5. Seek repair or replacement—use AppleCare+ or third party.
Long-Term Protection
- Buy AppleCare+ if you swim weekly.
- Rinse after every swim—non-negotiable.
- Never assume it’s waterproof—resistance fades.
- Watch for red lightning bolt—early sign of trouble.
Apple Watch is a powerful fitness tool—but its water resistance has limits. Treat it with care, act fast when it fails, and know your options. With the right steps, you might just bring it back from the dead.
Leave a Reply