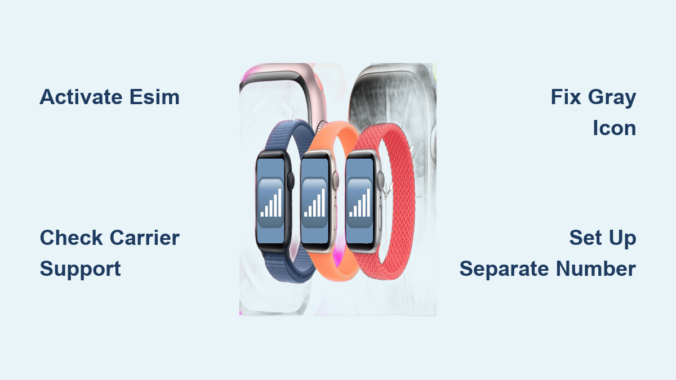
You just got your Apple Watch with cellular, ready to leave your phone at home — but there’s no SIM tray to insert. That’s because Apple Watch doesn’t use a physical SIM. Instead, it uses an eSIM, a digital SIM built into the device. So when you ask how to add SIM to Apple Watch, the real answer is: you don’t insert anything. You activate the embedded eSIM through your iPhone and carrier.
In this guide, you’ll learn exactly how to add SIM to Apple Watch, step by step — including carrier setup, dual plans, independent numbers, and troubleshooting gray icons or missing options. Whether you’re setting up your Series 9, Ultra 2, or Apple Watch SE, we’ll make sure your watch stays connected — even when your iPhone isn’t nearby.
By the end, you’ll know how to activate, manage, and fix cellular issues — all from your wrist.
Confirm Your Apple Watch Has Cellular
Before setting up service, verify your model supports cellular.
Look for These Physical and Digital Signs
- Red ring around the Digital Crown (Series 3–8, SE)
- Phone icon at the bottom of the watch face
- Model number ending in “A” or labeled “Cellular” in Settings > General > About
Supported models include:
– Apple Watch Series 3 (GPS + Cellular) and later
– Apple Watch SE (cellular version)
– All Apple Watch Series 9, Ultra, and Ultra 2 models
❌ GPS-only models cannot be upgraded to cellular — they lack the required eSIM hardware.
Check in the Watch App on iPhone
- Open the Watch app on your iPhone.
- Tap My Watch > Cellular.
- If you see “Set Up Cellular”, your watch supports it.
If the option is missing, either your model doesn’t support cellular, or your software is out of date.
Meet the Requirements to Add Cellular
You can’t activate cellular without meeting key device, software, and carrier conditions.
Device and Software Must Match
- iPhone 6s or newer running iOS 14 or later
- Apple Watch with watchOS 7 or newer
- Both devices signed into the same Apple ID
- Stable Wi-Fi connection during setup
Carrier and Account Must Support eSIM
- Carrier must support Apple Watch (e.g., AT&T, T-Mobile, Verizon, Vodafone, EE)
- Active account eligible for eSIM activation
- Dual SIM iPhone if adding multiple plans
⚠️ Prepaid, legacy, or enterprise plans may not support Apple Watch. Call your carrier to confirm.
How to Add SIM to Apple Watch (Activate eSIM)

Follow these steps to turn on cellular service.
Step 1: Open Cellular Settings in Watch App
- On your iPhone, open the Watch app.
- Tap My Watch > Cellular.
- Tap “Set Up Cellular.”
You’ll be redirected to your carrier’s activation portal.
Step 2: Complete Carrier Setup
Depending on your carrier, you may need to:
– Log in to your carrier account
– Accept terms and conditions
– Enable Number Sharing (so your watch uses your iPhone’s number)
After submission, wait for an SMS confirmation. Activation usually takes 1–5 minutes.
✅ Example: On T-Mobile, users log in via the T-Mobile app and approve Number Sharing before the eSIM downloads.
Step 3: Verify Cellular Is Active
- On Apple Watch: Settings > Cellular > Mobile Data
- Ensure both toggles are on
- Look for the green cellular icon at the top of the watch face
A green icon means cellular is active. A gray or white icon means it’s off or inactive.
Add and Switch Between Multiple eSIM Plans

Your Apple Watch can store up to five eSIMs, but only one is active at a time.
Add a Second Plan
- Open Watch app > My Watch > Cellular
- Tap “Add a New Plan”
- Select your carrier and follow prompts
Each plan is billed separately. Corporate accounts may require admin approval.
📌 Pro Tip: Use one plan for personal use, another for work — switch as needed.
Switch Active eSIM from iPhone or Watch
From iPhone:
- Watch app > My Watch > Cellular
- Tap the plan you want to activate
From Apple Watch:
- Settings > Cellular
- Choose the active line
Switching takes about 60 seconds. Incoming calls go to the active number.
✅ Smart Matching: When replying to a message, your watch automatically uses the same line the message came from.
Set Up Apple Watch with a Separate Phone Number
Want your watch to work like its own phone? Use a standalone number.
Create a Dedicated Apple ID
- Make a new Apple ID just for the watch.
- Do not sign in with this ID on your iPhone.
Pair as a Family Member
- During setup, choose “Set Up for Someone Else”
- On iPhone: Settings > [Your Name] > Family Sharing > Add Family Member > Add a Child
- Enter the new Apple ID
- Pair the watch using that account
Assign a Standalone Plan
Use your carrier’s app or website to:
– Add a new phone number
– Subscribe to a standalone data plan
✅ Benefits:
– Watch works without your iPhone
– Use a different carrier than your phone
– Perfect for kids or secondary users⚠️ Warning: Never use the same Apple ID on both devices if you want full independence.
Fix: “Set Up Cellular” Option Missing
If the button doesn’t appear, try these fixes.
Restart and Re-Pair Devices
- Restart both iPhone and Apple Watch
- Open Watch app and re-pair if needed
Update iOS and watchOS
- iPhone: Settings > General > Software Update
- Apple Watch: Settings > General > Software Update
Outdated software can hide cellular options.
Confirm Carrier Support
Some carriers disable activation unless:
– You’re on a compatible plan
– Number Sharing is enabled
– Account is in good standing
✅ Solution: Call your carrier and ask: “Does my plan support Apple Watch Number Sharing?”
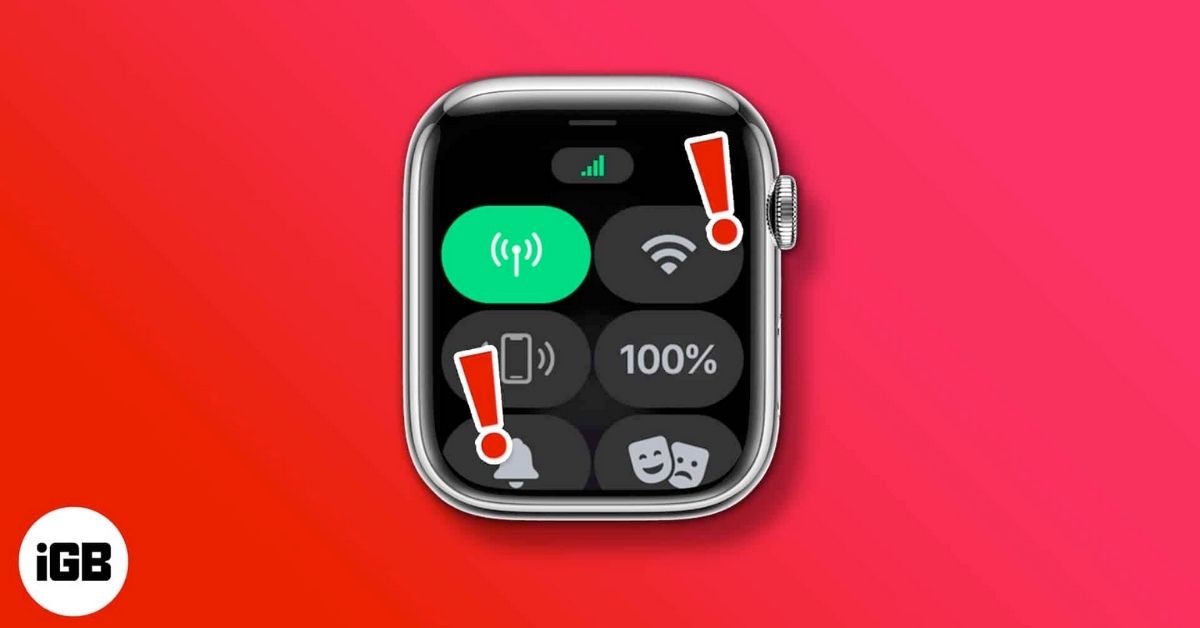
Fix: Gray or White Cellular Icon (No Connection)
A gray icon means cellular is set up — but not active.
Force Cellular Connection
- On Apple Watch: Settings > Wi-Fi > Off
- On iPhone: Turn on Airplane Mode or disable Bluetooth
- Wait 30–60 seconds
- Check for green cellular icon
This forces the watch to drop Wi-Fi/Bluetooth and connect via LTE.
✅ Why It Works: Apple Watch prioritizes the iPhone connection. Disabling Bluetooth breaks that link, triggering cellular fallback.
Test Independence
Walk 30+ feet from your iPhone. Try sending a message. If it works, cellular is active.
Use a U.S. Apple Watch in Europe (or European in U.S.)
Region-locked watches may fail to activate abroad.
Why This Happens
Carriers use Carrier Bundles — system files that only allow certain models. For example:
– A U.S. Apple Watch (SKU_NA) may not activate on European networks (which expect SKU_EU)
The “Set Up Cellular” button stays grayed out.
Jailbreak Workaround (Advanced Only)
Tools Needed:
- Jailbroken iPhone (iOS 16 or earlier)
- Sileo, Filza, CCPatch13
- palera1n (for checkm8 devices)
Steps:
- Unpair watch from main iPhone
- Pair with jailbroken device
- Insert SIM from main phone
- Install CCPatch13 to bypass carrier checks
- Use Filza to edit:
/var/mobile/Library/Carrier Bundles/Overlay/device-*.plist - Change SupportedSKUs from SKU_EU to SKU_NA (or vice versa)
- Reopen Watch app — “Set Up Cellular” should now appear
- Complete activation
- After 10 minutes, erase all content on watch
- Re-pair with main iPhone and restore from backup
📌 Note: Reception may be weaker due to LTE band differences (e.g., missing Band B20).
Final Tips for Best Cellular Performance
- Keep iOS and watchOS updated — carriers push new bundles via updates
- Toggle cellular off in Control Center when not needed to save battery
- Use Low Power Mode on watchOS 9+ to extend battery during long workouts
- Check Field Test Mode (
*3001#12345#*) on iPhone to see which LTE bands you’re using
Final Note: Adding SIM to Apple Watch is simple when you know the steps. With cellular active, you can leave your phone behind and stay connected — for calls, messages, maps, and more. Just follow this guide, confirm carrier support, and troubleshoot using the green icon test. Your fully independent smartwatch experience starts now.
Leave a Reply