
Imagine leaving your phone behind on a morning run and still being able to take a call, reply to a text, or stream music from your wrist. That’s exactly what happens when you add cellular to your Apple Watch. With an embedded eSIM, your watch gains its own data connection, letting it operate independently from your iPhone while sharing the same phone number and plan. This guide walks you through every step of adding cellular to your Apple Watch—whether you’re setting it up for the first time, activating it for a child, or troubleshooting activation issues.
Adding cellular turns your Apple Watch into a true standalone device. But not every model supports it, and setup depends on your carrier, software, and device compatibility. Below, we’ll cover how to confirm your watch supports cellular, activate the eSIM, manage data usage, and fix common problems—all with clear, actionable steps.
Check If Your Apple Watch Supports Cellular
Before you can add cellular, you need to know if your Apple Watch is capable.
Look for the Red Digital Crown
The easiest visual clue is the Digital Crown. If it has a red circle or red ring, your watch is the cellular model. GPS-only versions have a silver or aluminum crown. This small detail makes a big difference—only cellular models can connect independently.
Verify in Settings
You can also check digitally:
1. On your Apple Watch, open Settings
2. Tap General > About
3. Scroll down and look for “Cellular” under Network
If it lists cellular, you’re good to go. If not, your model doesn’t support eSIM, and you can’t add this feature later.
Compatible Apple Watch Models
Only certain models support cellular. Here’s the full list:
– Apple Watch SE (all generations)
– Apple Watch Series 3 and later, including Series 9 and Series 11
– Apple Watch Ultra, Ultra 2, and Ultra 3
– Apple Watch SE 3
Note: Cellular models cost $50–$100 more than GPS-only versions and cannot be upgraded post-purchase.
Confirm iPhone and Carrier Requirements
iPhone and Software Needs
To set up cellular, your iPhone must meet these requirements:
– iPhone 6S or newer
– iOS 17 or later
– Latest watchOS on your Apple Watch
– Both devices paired, charged above 50%, and on the same Wi-Fi network
Update both devices before starting:
– iPhone: Settings > General > Software Update
– Apple Watch: Settings > General > Software Update
Carrier Compatibility
Your carrier must support Apple Watch eSIM. Supported providers include:
– U.S.: AT&T, Verizon, T-Mobile, Visible
– Canada: Rogers, Bell, Telus
– UK: EE, O2, Vodafone
– Australia: Telstra, Optus
Your plan must also support:
– VoLTE (Voice over LTE)
– eSIM provisioning
– Family Setup (if adding for a child)
– International roaming (if traveling)
Prepaid, legacy, or enterprise plans may not qualify.
Understand How eSIM Works on Apple Watch

What Is an eSIM?
An eSIM (embedded SIM) is a digital SIM built into your Apple Watch. It connects to your carrier account without needing a physical card.
Benefits of eSIM:
- No hardware changes required
- Remote activation via iPhone
- Store up to five eSIM profiles
- Easy carrier switching and international roaming
Your Apple Watch uses the eSIM to share your iPhone’s number and data plan, enabling calls, texts, and internet access even when your phone is miles away.
The eSIM links directly to your carrier—just like your iPhone’s SIM.
Activate Cellular During Initial Setup
Pairing a New Apple Watch
When setting up a new watch:
1. Hold your iPhone near the Apple Watch to start pairing
2. Follow prompts until you reach “Set Up Cellular”
3. Select your carrier
4. Choose a plan (if options appear)
5. Authenticate with your carrier (via login or SMS code)
6. Wait for confirmation
This is the fastest and most reliable method.
Once done, your watch restarts and shows cellular signal bars in the top-left corner of the screen.
Add Cellular After Setup Using the Apple Watch App

Activate Anytime Post-Setup
If you skipped cellular during initial setup:
1. Open the Apple Watch app on your iPhone
2. Tap My Watch
3. Go to Cellular
4. Tap Set Up Cellular
5. Choose your carrier
6. Follow prompts to confirm plan and authenticate
Some carriers display pricing; others redirect to a web portal.
Activation takes a few minutes. A green checkmark means success.
Set Up Cellular for a Child Using Apple Watch For Your Kids
Enable Independence for Young Users
You can add cellular to an Apple Watch for a child without an iPhone using Apple Watch For Your Kids (formerly Family Setup).
Key Features:
- Child can call, text, and use Emergency SOS
- Parent manages settings from their iPhone
- Watch can use a different carrier than the parent’s phone
Step-by-Step Setup
- Open Apple Watch app on your iPhone
- Tap All Watches > Add Watch
- Select Set Up for a Family Member
- Pair the watch via camera alignment
- During setup, tap Set Up Cellular
- Choose:
– Add to your family plan (if supported), or
– Use a separate carrier account - Complete carrier verification
After setup, check the assigned number: Settings > Phone on the watch.
Limitations:
- Not available in all countries
- No international roaming
- Identity verification required in mainland China
Monitor and Manage Data Usage
Track Monthly Consumption
To check data:
1. Open Apple Watch app on iPhone
2. Tap My Watch > Cellular
3. Scroll to Cellular Data Usage
Most carriers charge $5–$15/month for Apple Watch cellular. Some offer free 3–6 month trials.
The displayed number may differ from your iPhone’s—this is normal. Both devices share the same number for calls and messages.
Network Support by Model
| Model | Networks Supported |
|---|---|
| Series 11, SE 3, Ultra 3 | 4G LTE, 5G |
| Series 5–10, SE, Ultra 1–2 | 4G LTE, 3G (UMTS) |
No Apple Watch works globally—regional models are optimized for local bands.
Switch or Transfer Carriers
Move to a New Apple Watch
When upgrading:
1. Remove plan from old watch:
– Apple Watch app > My Watch > Cellular
– Tap info (i) > Remove [Carrier] Plan
2. Pair your new Apple Watch
3. During setup, tap Set Up Cellular
4. Some carriers auto-transfer; others require reactivation
Erasing the old watch removes the plan.
Change Carriers
If switching carriers:
1. Open Apple Watch app > My Watch > Cellular
2. Remove old plan
3. Tap Add a New Plan
4. Select new carrier and follow activation
Confirm Apple Watch support with your new carrier.
Enable International Roaming
Stay Connected Abroad
Roaming is supported on:
– Series 5 and later
– SE and Ultra models
– With watchOS 9.1 or later
Requirements:
- iPhone plan must include international roaming
- Carrier must support VoLTE and Apple Watch roaming
- Not supported on Family Setup watches
How to Activate
- Contact your carrier to enable Apple Watch roaming
- On Apple Watch: Settings > Cellular
- Turn on Data Roaming
Test connectivity before travel—coverage depends on local agreements.
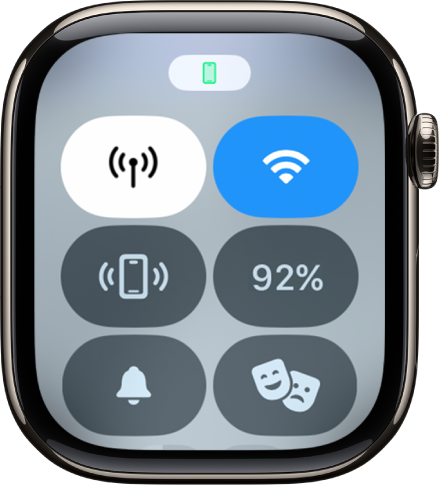
Control Cellular Connection
Monitor and Toggle Connection
When using cellular:
– Open Control Center (press side button)
– Look for the Cellular button
– Green: Connected via LTE/5G
– White: Using Wi-Fi or Bluetooth
Signal strength appears as green bars.
Save Battery by Turning Off Cellular
To extend battery life:
1. Open Control Center
2. Tap Cellular
3. Toggle Cellular off
This forces the watch to use Bluetooth or Wi-Fi only.
Fix Common Setup Issues
Stuck on “Loading” Screen (Visible Example)
Some users on Visible see:
“Visible | Please wait while the page is loading…”
Cause:
- Parental controls block Safari during setup
- Process fails silently with no error
Solution:
- Go to Settings > Screen Time > Content & Privacy Restrictions
- Turn off website restrictions (e.g., “Allowed Websites Only”)
- Retry Set Up Cellular
- Re-enable restrictions after success
Confirmed fix for users blocked by filters.
General Troubleshooting
If setup fails:
1. Turn on Airplane Mode on both devices
– Wait 15 seconds
– Turn off
– Retry
2. Relaunch Apple Watch app
3. Restart both devices
4. Delete old eSIMs on iPhone: Settings > Cellular > Cellular Plans
5. Re-pair watch: Erase all content and settings
If unresolved, contact your carrier—they may need to push a profile.
Know the Limitations
Device and Ecosystem Limits
- No Android support: Requires iPhone
- Max 5 eSIM profiles stored
- Some apps need iPhone nearby for full function
- Apple Pay and health features may require initial iPhone setup
Battery Impact
Using cellular drains battery faster. Expect:
– Shorter battery life during heavy LTE/5G use
– Up to 18 hours under mixed use
– Reduced performance with 5G enabled
Tip: Turn off cellular when not needed.
Final Setup Checklist
| Step | Action |
|---|---|
| 1 | Confirm red Digital Crown |
| 2 | Update iPhone to iOS 17+, watchOS latest |
| 3 | Ensure same carrier (except Family Setup) |
| 4 | Open Apple Watch app > My Watch > Cellular |
| 5 | Tap Set Up Cellular and follow prompts |
| 6 | Disable content restrictions if stuck |
| 7 | Test by disabling Wi-Fi/Bluetooth on watch |
| 8 | Monitor data usage monthly |
Always contact your carrier first to confirm eligibility.
Maximize Your Apple Watch Independence
Adding cellular to your Apple Watch transforms it from a fitness tracker into a full communication device. Whether you’re a runner, parent, or traveler, cellular lets you stay connected without your phone. Start by confirming your model and carrier support. Use the Apple Watch app to activate the eSIM—either during setup or anytime after. For kids, use Apple Watch For Your Kids to manage safety and communication. And if issues arise, check parental controls or contact your carrier.
With cellular active, your Apple Watch becomes more than a wrist companion—it becomes your phone on your wrist.
Leave a Reply