Changing the band on your Apple Watch Series 9 is one of the easiest ways to refresh your look or match your watch to your activity—whether it’s a workout, work meeting, or weekend adventure. With a simple press-and-slide mechanism, you can swap bands in seconds, no tools required. The Series 9 comes in two case sizes—41mm and 45mm—and supports all Apple bands and most third-party bands designed for those sizes. This means you can choose from sleek metal bracelets to stretchable loops and rugged outdoor straps, all with secure, seamless attachment.
In this guide, you’ll learn exactly how to remove and install any Apple Watch Series 9 band, avoid common mistakes, and ensure a snug, secure fit every time. From the flexible Solo Loop to the premium Link Bracelet and adventure-ready Trail Loop, we’ll walk you through each step with clear instructions, pro tips, and troubleshooting advice. Let’s get your Apple Watch looking—and feeling—just right.
Prepare Your Watch and Workspace
Before touching the band release, set up a safe environment to protect your Apple Watch from scratches or drops.
Place Watch Face Down Safely
Lay your Apple Watch Series 9 face down on a soft, lint-free surface like a microfiber cloth or padded mat. This prevents the always-on Retina display from getting scratched during the band change. Avoid rough or dusty surfaces—lint can interfere with the band connectors.
Confirm Band Compatibility
Double-check that your new band matches your Apple Watch case size: 41mm or 45mm. While bands from Series 1 through 8 are compatible if sized correctly, always verify the fit. Third-party bands must use Apple’s proprietary quick-release system to attach securely. Using an incompatible band may result in wobbling, disconnection, or damage to the watch case.
Check Band Release Mechanism
The Series 9 uses Apple’s standard spring-loaded band release system. On each side of the case, you’ll see a small pinhole button. Pressing it retracts an internal latch, allowing the band to slide out. Familiarize yourself with this button—you’ll need to press and hold it firmly to disengage the mechanism.
Remove Any Standard Band
Most Apple bands—including the Sport Band, Modern Buckle, and Leather Loop—attach and detach the same way.
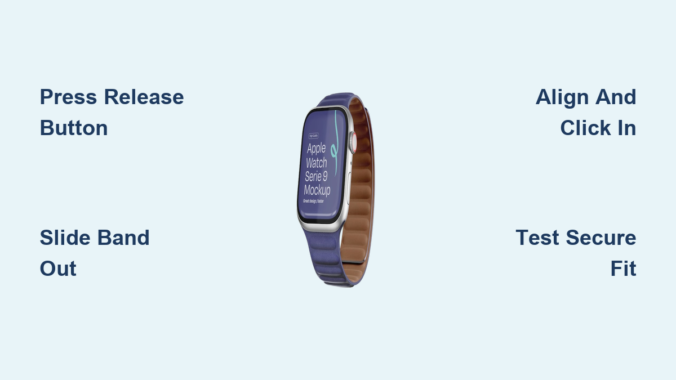
Press and Hold Release Button
Locate the band release button on the side of the watch where the band is attached. Press and hold it down with your fingertip or fingernail. You’ll feel a slight give as the internal latch releases. Keep consistent pressure—don’t tap or press lightly.
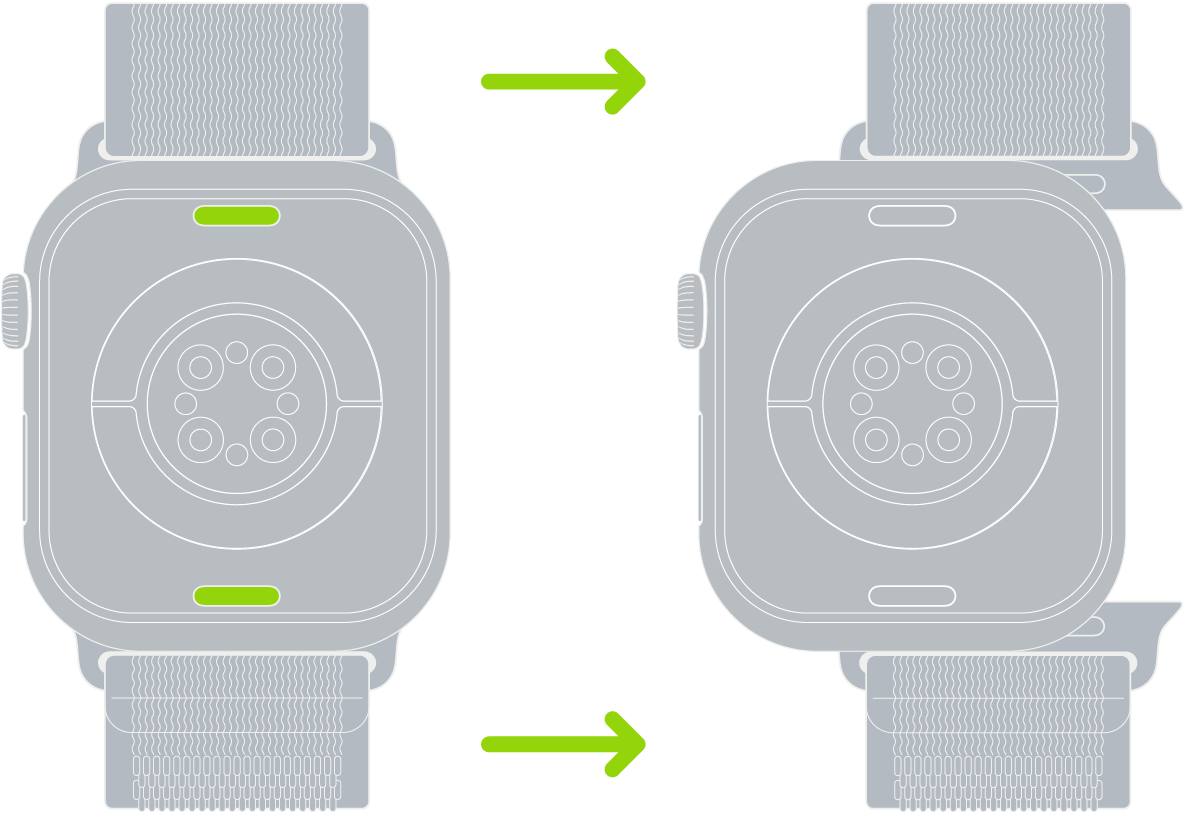
Slide Band Out Smoothly
While holding the button, gently slide the band straight out from the case. Move it sideways, not upward or at an angle. If it doesn’t budge, re-press the button fully and try again. Forcing or twisting the band can bend the internal pin or damage the latch.
Remove Second Side
Once one end is free, repeat the process on the opposite side. After both ends are detached, set the band aside. Never pull the band without pressing the release button—this is the most common cause of connector damage.
Install a New Compatible Band
Attaching a new band is just as simple, but alignment is key to a secure fit.
Align Band with Watch Case
Hold the new band so the connector is flat and facing the gap in the watch case. Make sure any text or logo on the band is facing you—this indicates correct orientation. Misaligned bands may not click in properly.
Slide Band In Until It Clicks
Insert one end of the band straight into the slot. Push it in until you feel and hear a distinct click. That’s the latch engaging. Repeat on the other side. If you don’t hear a click, remove and reinsert—ensure you’re pushing straight in, not at an angle.
Test Band Security
Gently tug on both ends of the band. It should stay firmly in place unless you press the release button. If it slides out easily, it’s not locked. Remove it, press the release button, and reinsert with more force and better alignment.
Use the Solo Loop or Braided Solo Loop
The Solo Loop and Braided Solo Loop are seamless, stretchable bands with no clasps or buckles—ideal for comfort and simplicity.
Stretch Band Over Your Wrist
Grasp the bottom of the band and gently stretch it over your hand. The silicone or braided material is designed to flex without losing shape. Slide it onto your wrist until it sits snugly but comfortably.
Remove by Reversing the Motion
To take it off, hook your fingers inside the loop and stretch it downward, pulling it off the same way. Avoid sharp jewelry or nails that could snag or tear the material.
Choose Correct Size for Series 9
Solo Loops come in precise sizes (XS to XL). Because the Series 9 has a larger case than older models, you may need a smaller Solo Loop size than expected. For example, if you wore a Medium on a 40mm watch, try a Small on a 41mm Series 9. When in doubt, visit an Apple Store to try before you buy.
Adjust and Secure the Link Bracelet
The Link Bracelet offers a premium, customizable fit with a built-in micro-adjustment system.
Separate Bracelet Into Two Halves
Before removing it from the watch, press the quick release button on the inside of one link. Hold it down and pull the two halves apart. This reduces stress on the connectors during removal.
Remove from Watch Case
With the bracelet split, press the band release button on the watch and slide each half out. Repeat on the other side.
Reattach and Resize Links
Slide one end of the Link Bracelet into the case until it clicks. Repeat on the other side. To resize, open the butterfly clasp and slide the links to tighten or loosen. Close the clasp until it clicks—this allows for on-the-fly adjustments throughout the day.
Handle the Milanese Loop with Care
The magnetic Milanese Loop offers a sleek, adjustable fit with a modern closure.
Open Magnetic Closure Completely
On newer Milanese Loops (2018 and later), slide the magnetic pin all the way through the band lug to fully open the band. On older models, the pin doesn’t slide through—lift it gently from the loop instead.
Attach to Series 9 Case
Align the connector with the watch case and slide in until it clicks. Make sure the metal end with the latch faces inward, toward your wrist, for a secure fit.
Adjust Fit Without Tools
Lift the metal clamp on the band. Slide the magnetic buckle up or down along the mesh to fit your wrist snugly. Keep the buckle parallel to the band for even tension. Press the clamp down to lock it in place.
Set Up Rugged Bands: Ocean, Alpine, Trail Loop

Built for extreme conditions, these bands offer durability and a secure lock.
Confirm Band Is 45mm for Series 9
The Ocean Band, Alpine Loop, and Trail Loop are designed for 45mm cases, making them perfect for the larger Series 9. While made for Apple Watch Ultra, they’re fully compatible and ideal for swimming, hiking, or gym sessions.
Align Lug Parallel to Case
Before inserting, ensure the band’s connector edge (lug) is parallel to the watch case. Tilting can prevent proper seating and damage the latch.
Push with Metal Tooth Facing Down
Insert the lug with the small metal tooth pointing downward. This tooth engages the internal lock—correct orientation is essential for security. Push gently but firmly until you hear a click.
Avoid Use During High-Impact Activities If Loose
Never wear these bands if they feel loose. A secure band won’t move side-to-side. For diving or climbing, double-check both sides before starting. If the band slides without pressing the button, reinstall it properly.
Adjust the Modern Buckle Band
The Modern Buckle combines minimalist leather design with a magnetic closure for easy wear.
Open Magnetic Closure
Press the release buttons on both sides of the clasp to unlock the two-part magnetic buckle. The band will separate into two halves.
Resize Using Adjustment Holes
Slide the prong through the leather strap to tighten or loosen. Use the multiple holes to find a fit that’s snug but comfortable. Too loose, and the band may shift; too tight, and it won’t close properly.
Reconnect Magnetic Clasp
Align the two halves of the buckle and bring them together slowly. They’ll snap into place with a firm click. Ensure both sides lock evenly—misalignment can cause the band to pop open unexpectedly.
Troubleshoot Common Band Issues
Even with care, issues can occur. Here’s how to fix them fast.
Band Won’t Click Into Place
If the band doesn’t click, remove it and reinsert. Wiggle it slightly left and right while pushing to help the latch engage. Check for lint or debris in the slot—clean it with a soft brush if needed.
Band Slides Out Without Pressing Button
This means the latch didn’t engage. Remove the band, press the release button fully, and reinsert. A properly installed band only comes out when the button is pressed.
Watch Feels Unbalanced or Loose
Check that both sides are clicked in equally. A misaligned band can cause wobbling. Also, confirm the band is the correct size—using a 41mm band on a 45mm watch (or vice versa) creates instability.
Damage from Forcing the Band
Never twist or yank the band. Forcing it can bend the internal pins or break the latch. If you meet resistance, stop, recheck alignment, and try again gently.
Maintain Band and Watch Longevity
Keep your Apple Watch and bands in top shape with simple care habits.
Clean Connectors Monthly
Use a dry, soft brush or compressed air to remove lint and debris from the band slots. Buildup can prevent proper clicking and reduce connection security.
Rotate Bands Regularly
Switching bands weekly reduces wear and extends the life of each strap. It also prevents sweat and oils from degrading materials like leather or fluoroelastomer.
Store Bands Flat and Dry
Keep unused bands in a cool, dry place away from sunlight. Avoid folding or compressing stretch bands like the Solo Loop for long periods—this helps maintain elasticity.
Changing your Apple Watch Series 9 band is a quick, satisfying way to personalize your device. Whether you’re switching to a sporty Trail Loop for the gym or a polished Milanese Loop for the office, the process takes less than a minute. Just press, slide, and click—no tools, no hassle. The key is proper alignment, listening for the click, and never forcing the mechanism. With the right fit and care, your Apple Watch stays secure, stylish, and ready for anything.
Leave a Reply