Removing the strap from your Apple Watch is a quick, tool-free process designed for easy customization. Whether you’re switching to a sleek leather band for work or a sporty Solo Loop for the gym, knowing how to properly detach the band ensures your device stays in perfect condition. Apple’s universal quick-release mechanism works across all models—from the original Series 1 to the rugged Apple Watch Ultra—so the same method applies regardless of your watch size or band type. However, after months or even years of constant wear, dirt, sweat, and skin oils can accumulate in the tight mechanical slots, causing bands to stick and resist removal. In this guide, you’ll learn the correct way to remove any Apple Watch strap, how to safely fix a stubborn or stuck band, and how to install a new one securely—without risking damage to your device.
Standard Removal Steps
Follow these simple steps to remove your Apple Watch band in seconds—no tools required.
Flip the Watch Over
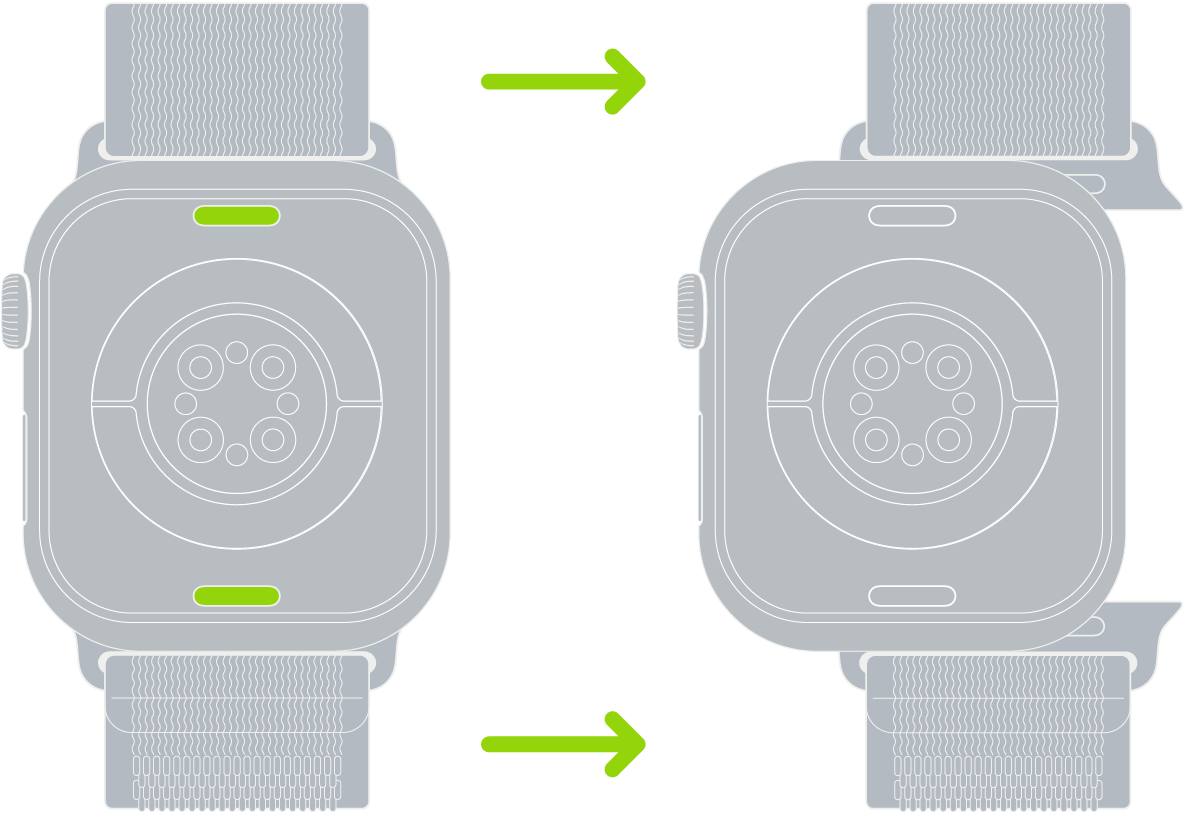
Place your Apple Watch face-down on a soft, clean surface like a microfiber cloth or towel. This protects the display and gives you full access to the two band attachment points located on the back of the case, near the top and bottom.
Locate the Release Buttons
On each side of the case, you’ll see small, pill-shaped buttons flush with the casing. These are the band release mechanisms. They may be hard to spot at first, especially on stainless steel or black aluminum models, but they run horizontally along the band connector area.
Press and Slide the Band
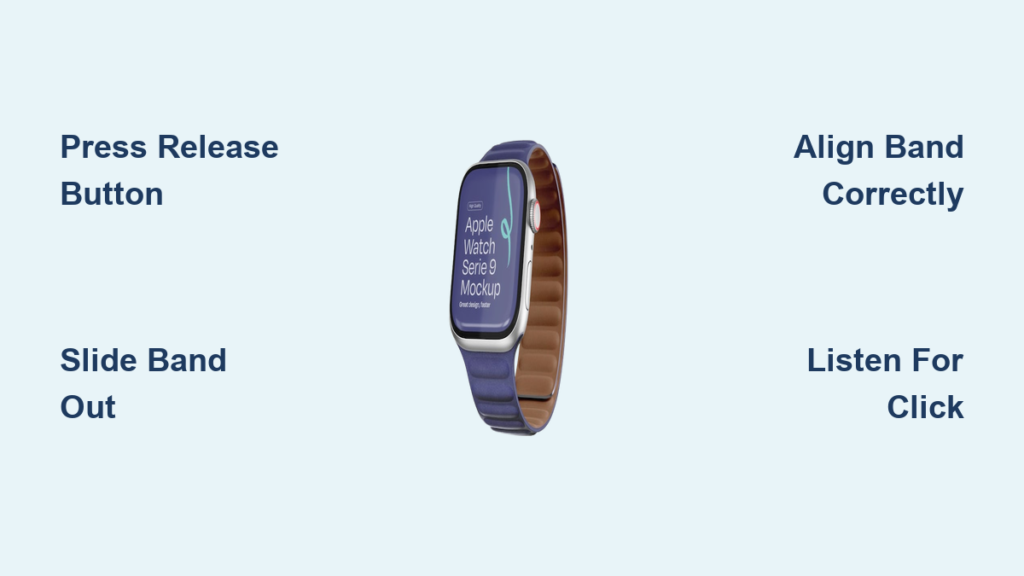
Press and hold the release button on one side—press it all the way down. You should feel a slight give when the internal lock disengages. While holding the button, gently slide the band straight out in a horizontal motion. Do not pull upward or twist the band, as this can damage the delicate internal dimple or the connector pins.
Repeat the same process on the other side. Once both ends are released, the band comes free. With a little practice, the entire process takes less than 10 seconds.
Pro Tip: If the band doesn’t budge, double-check that you’re pressing the button fully. Partial pressure won’t unlock the mechanism.
Installing a New Band Correctly
Putting on a new band is just as easy—but proper alignment is key to a secure fit.
Align and Insert One End
Take your new band and align one end with the slot on the watch case. Make sure it’s oriented correctly: logos and stitching should face outward, and the smooth side of the connector should rest against the case. Slide it in gently—no button press is needed. You’ll hear or feel a soft click when it locks into place.
Attach the Opposite Side
Repeat the insertion on the other side. Push the second end in until it clicks. Again, no release button is required during installation.
Check for Security
Gently tug and wiggle the band. A properly attached band should feel solid with minimal movement. If it wobbles or feels loose, remove it and reinsert both ends—sometimes one side doesn’t fully engage.
For Magnetic Bands: When installing a Milanese Loop or other magnetic band, guide it slowly into the slot. The magnets will help pull it into alignment, but ensure it’s fully seated before wearing.
Fixing a Stuck Apple Watch Strap
Even with Apple’s reliable design, bands can sometimes get stuck—especially if worn for over a year without removal.
Why Bands Get Stuck
Common reasons include:
– Buildup of dirt, sweat, or skin oils in the connector slot
– Corrosion between metal parts in humid environments
– A jammed internal spring or dimple due to pressure or debris
– Over-tightening or constant friction from daily wear
If the band won’t release, do not force it. Instead, follow these safe troubleshooting steps.
Use a Non-Metal Tool
Grab a plastic spudger, toothpick, or iFixit pry tool. These won’t scratch your watch case. Press the release button firmly along its full length—sometimes only part of the mechanism is engaged. Move the tool slightly back and forth to free any internal obstruction.
Never use metal tools like paperclips or tweezers. They can leave permanent scratches, especially on aluminum models.
Apply Isopropyl Alcohol
Isopropyl alcohol (70% or higher) dissolves grime safely and evaporates cleanly. Here’s how to use it:
- Pour a small amount into a bottle cap.
- Dip a Q-Tip into the liquid.
- Apply it around the release button and along the edge of the band where it meets the case.
Let the alcohol wick into the gap. It will loosen stuck debris over time.
Warning: Avoid getting liquid near the digital crown, speaker, or microphone openings. Do not pour alcohol directly onto the watch.
Gently Work the Band Loose
While holding the release button down, gently wiggle the band side to side and slide it slightly in and out. Combine repeated button presses with additional alcohol applications if needed.
This may take several minutes for heavily stuck bands—especially those worn continuously for over a year.
Patience Pays Off: Let the alcohol do the work. Forcing the band can break the internal lock or bend the connector pin.
Clean After Removal
Once the band is off:
– Wipe the band connector with an IPA-soaked Q-Tip.
– Clean the watch slot with a dry or slightly dampened swab.
– Let both parts dry completely before reattaching.
Never Use WD-40: Lubricants attract dust and can degrade rubber seals. Stick to isopropyl alcohol only.
Choose the Right Replacement Band

Not all bands fit every model. Always match your band to your watch size.
Check Your Watch Size
Apple Watch case sizes include:
– 38mm / 40mm / 41mm (smaller models)
– 42mm / 44mm / 45mm / 49mm (larger models)
A 41mm band won’t fit a 45mm case. To confirm your size, go to Settings > General > About on your watch.
Universal Attachment System
All Apple Watches use the same pin-and-slot connector. As long as the size matches, any official or certified third-party band will attach securely.
Compatible styles include:
– Sport Band
– Leather Loop
– Milanese Loop
– Stainless Steel Link
– Solo Loop
– Braided Solo Loop
Each uses the same removal and installation method.
Wear Your Watch for Best Performance
After changing bands, wear your Apple Watch correctly to ensure sensors work properly.
Snug, Not Tight
The watch should sit snugly on top of your wrist, about a finger’s width from your wrist bone. Too loose, and heart rate readings will drop. Too tight, and it can restrict blood flow.
Maintain Skin Contact
The back sensors need consistent skin contact for:
– Wrist detection (locks when removed)
– Heart rate monitoring
– ECG readings
– Haptic feedback
Avoid wearing the watch upside down—connectors may press into your skin, and sensors may misread data.
Allow Airflow
If you wear your watch all day, take it off occasionally to let your skin breathe. Clean the band weekly to prevent odor and irritation.
Essential Tools for Strap Removal

| Tool | Purpose |
|---|---|
| Plastic spudger | Press release button safely |
| Toothpick | DIY alternative for button access |
| Isopropyl alcohol (70%+) | Dissolve stuck grime |
| Q-Tip | Apply alcohol precisely |
| Microfiber cloth | Wipe down case and band |
Keep these on hand for smooth band changes.
Avoid Common Mistakes
Even simple tasks can go wrong. Avoid these errors:
- Forcing the band out: If it resists, recheck the button. Forcing it can damage the mechanism.
- Using metal tools: They scratch aluminum cases easily. Stick to plastic.
- Skipping the clean step: Dirt left behind leads to future sticking.
- Installing backwards: Some bands have a top/bottom orientation. Check stitching or labels.
When to Seek Professional Help
If the band still won’t release after trying all steps:
– The release button feels broken or loose
– The band moves slightly but won’t come out
– You see visible damage or corrosion
Stop trying. Visit an Apple Store or authorized service provider. Technicians have specialized tools and can fix mechanical issues safely.
Warranty Note: Damage from improper removal may not be covered.
Maintain Long-Term Band Health
Keep your Apple Watch looking and working great with simple habits.
- Clean bands weekly: Rinse Sport Bands, wipe Leather Bands, brush Metal Bands, hand wash Solo Loops.
- Rotate bands regularly: Switching reduces wear and prevents skin irritation.
- Inspect connectors monthly: Clean slots with a dry Q-Tip to remove debris.
Final Tips for Hassle-Free Band Changes
- Always press the button fully before sliding.
- Never twist or pry—use straight-line motion.
- Use alcohol only when stuck—not for routine removal.
- Store bands flat to prevent warping.
- Buy certified bands for reliable fit and safety.
By following these steps, you can remove and replace your Apple Watch strap in seconds—safely, confidently, and without damage. Whether refreshing your look or fixing a stubborn band, the process is designed to be user-friendly. With proper care, your Apple Watch will stay secure, functional, and stylish for years to come.
Final Note: If your band still won’t budge after cleaning and gentle effort, contact Apple Support or visit an Apple Store. Never risk damaging your watch with force.