Changing your Apple Watch band is one of the easiest ways to refresh your style or switch from workout mode to formal wear. Whether you’re upgrading to a new look or cleaning your current band, knowing how to take off an Apple Watch band correctly ensures you don’t damage the watch or connectors. The process is simple and tool-free across most models, but small differences exist between band types. In this guide, you’ll learn exactly how to remove any Apple Watch band—Solo Loop, Link Bracelet, Milanese, or sport bands—with confidence and care.
All Apple Watch models (except loop-only styles) use a quick-release pin system that allows removal with just a finger press. But if done incorrectly, you risk scratching the case or bending internal mechanisms. Follow these steps to avoid common mistakes and keep your device secure and scratch-free.
Standard Removal for Most Bands
Most Apple Watch bands—including Sport, Nike Sport, Leather, and Modern Buckle—use the same quick-release mechanism.
Locate the Release Button
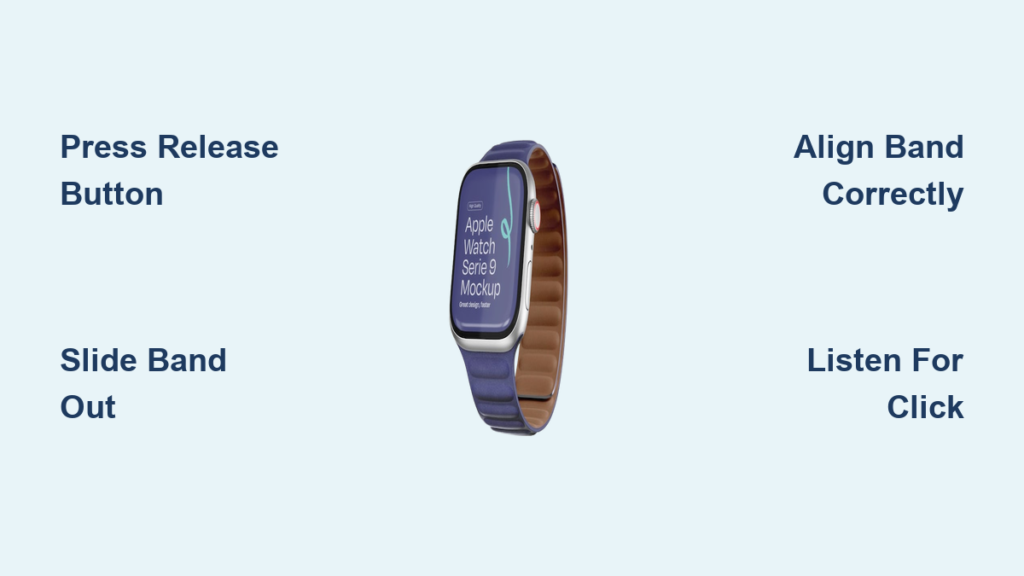
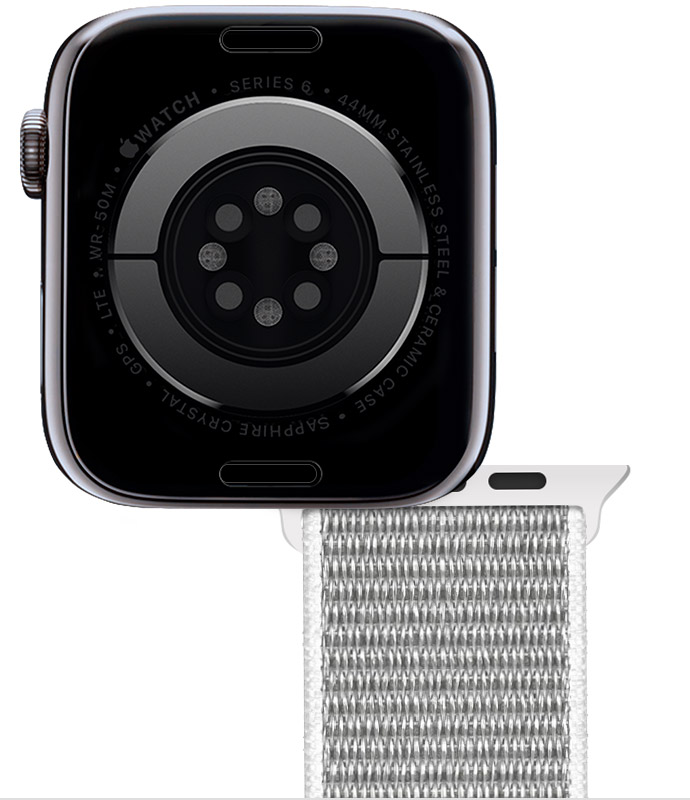
Flip your Apple Watch face down on a soft surface like a microfiber cloth. On each side of the case, near the band attachment, you’ll see a small rectangular release button. This button disengages the spring-loaded pin that holds the band in place.
Pro Tip: Always protect the display by placing the watch face-down on a soft surface.
Press and Slide the Band Out
Press and hold the release button on one side. While holding it, gently slide the band straight out from the watch case. Do not twist or yank—it should move smoothly once the button is fully depressed.
Repeat on the opposite side. Once both ends are removed, set the band aside.
✅ You’ll know it’s working when the band glides out with light pressure.
❌ Don’t force it—if it sticks, recheck that the button is fully pressed.
This method works for all standard bands that attach via pins, including recycled rubber Sport Bands and sleek Leather Loops. The entire process should take less than 15 seconds once you’re familiar with it.
How to Remove Solo Loop & Braided Solo Loop
The Solo Loop and Braided Solo Loop have no hardware or release buttons. They’re designed to stretch over your hand like a sock.
Stretch and Pull Over Hand
To remove:
1. Grip the bottom of the band where it rests on your wrist.
2. Gently stretch the knit material.
3. Slide it over your hand.
There’s no need to detach it from the watch unless you’re replacing it.
To Detach from Watch
If you want to remove the Solo Loop entirely:
1. Press the band release button on one side of the case.
2. Slide the loop’s connector straight out.
3. Repeat on the other side.
⚠️ Warning: Never cut the Solo Loop unless replacing it—there’s no way to reattach it.
Because these bands are seamless, they require precise sizing. If you find it too tight or loose, consider switching to a different size—but always stretch carefully to avoid damaging the elastic fibers.
Removing the Link Bracelet

The Link Bracelet (available for stainless steel and titanium models) requires an extra step: splitting the two halves at the clasp before removal.
Close the Butterfly Clasp First
Before removing:
1. Close the butterfly clasp by pressing both sides inward until they click.
2. This aligns the internal pins for safe disconnection.
Separate the Two Halves
- On one end of the bracelet, locate the quick release button on the inner side.
- Press and hold it while gently pulling the two halves apart.
- Now each half can be removed from the watch separately.
Remove from Watch Case
With the bracelet split:
– Press the band release button on the watch.
– Slide one half straight out.
– Repeat on the other side.
🔧 Expert Note: Never try to remove the Link Bracelet while the clasp is still connected—it can damage the hinge mechanism.
Reassembly is the reverse: reconnect the two bracelet halves first, then insert each end into the watch case until they click securely.
Taking Off the Milanese Loop
The Milanese Loop uses a magnetic closure and a unique sliding design.
Open the Magnetic Clasp
Lift the magnetic buckle away from the mesh to open the band. For newer models (2018+), the clasp slides fully through the lug, allowing complete removal.
Release from Watch Case
- Press the band release button on one side.
- Slide that end of the band straight out.
- Repeat on the other side.
💡 Fit Tip: To adjust tightness on the Titanium Milanese Loop, lift the clamp and slide the magnetic buckle along the mesh to a new position.
This band offers a refined, professional look and adjusts effortlessly. Just make sure the magnetic end slides cleanly through the lug when removing or installing.
Ocean, Alpine, and Trail Loop Removal

These rugged bands are designed for Apple Watch Ultra (49mm), built for diving, hiking, and extreme sports.
Confirm Compatibility
Only use 49mm bands with Apple Watch Ultra for full performance. Smaller 44–46mm bands fit but aren’t recommended for high-intensity use.
Remove Like Standard Bands
- Press the release button on one side.
- Slide the band straight out.
- Repeat on the other side.
✅ Check orientation: The metal tooth on the lug must face downward when reinstalling.
These bands are made from ultra-durable, flexible fluoroelastomer and feature a precision fit system. Their design ensures they stay secure even during intense movement or submersion.
Band Compatibility Guide
Using the wrong size band can lead to poor fit or damage.
Match Case Size Exactly
| Watch Model | Compatible Band Sizes |
|---|---|
| Series 1–3 | 38mm / 42mm |
| Series 4–6 | 40mm / 44mm |
| Series 7–9, SE | 41mm / 45mm |
| Ultra | 49mm (rugged), 44–46mm (casual) |
🔄 Cross-Generational Use: A 45mm band from Series 7 works on a Series 9—size matters more than model year.
Avoid Upside-Down Installation
Always ensure text on the band faces you when inserting. Installing backward can:
– Prevent locking
– Cause skin irritation
– Lead to scratches
Manufacturers often print logos or labels on the inner side—this should face outward when worn. Double-check before clicking it in.
Troubleshooting Common Issues
Even simple tasks can go wrong. Here’s how to fix frequent problems.
Band Won’t Slide Out
Cause: Release button not fully pressed.
Fix: Use a fingertip to press firmly and hold while sliding. Ensure no debris is blocking the button.
🛠️ Do not use tools—this can scratch or jam the mechanism.
Band Won’t Click Back In
Cause: Misalignment or dirt in the slot.
Fix:
1. Clean the slot with a dry, soft brush or compressed air.
2. Align the band so text faces you.
3. Push straight in until you hear a click.
✅ Test security: Gently wiggle the band. It should only move when the release button is pressed.
Band Feels Loose or Wobbly
If the band moves without pressing the release button:
– Reinstall it carefully.
– Check for physical damage to the band or watch lug.
– Do not wear until fixed—risk of accidental detachment.
Scratches on Skin or Case
Often caused by:
– Installing the band upside down
– Using low-quality third-party bands with sharp edges
Always inspect bands for burrs or misalignment before wearing.
Safety & Best Practices
Apple designed the band system for daily changes—no tools required, no risk to warranty.
Never Use Force or Twist
Twisting or forcing the band can:
– Bend the internal spring pins
– Damage the watch lugs
– Void potential warranty claims for user-caused damage
✅ Correct motion: Press button → slide straight out.
Visual and Tactile Confirmation
When reinstalling, look for:
– A clear click sound
– No wobble when gently shaken
– Band sitting flush with the case
These signals confirm secure attachment.
Maintenance Tips for Longevity
Keep your band and watch in top shape with simple care.
Clean Connectors Regularly
After workouts or swimming:
– Wipe bands with a damp cloth
– Dry thoroughly before reattaching
– Use compressed air to remove lint from watch slots
Protect Metal Bands
Avoid prolonged exposure to:
– Saltwater
– Chlorine
– Sweat (rinse and dry if exposed)
These can corrode stainless steel or titanium over time.
Inspect for Wear
Check every few weeks for:
– Loose connectors
– Fraying (on fabric bands)
– Weakened magnets (Milanese)
Replace worn bands early to avoid sudden failure.
What to Do If You’re Stuck
Even with care, issues happen.
Visit Apple Support
Apple Stores and Authorized Service Providers can:
– Safely remove stuck bands
– Replace damaged lugs
– Help with sizing (especially for Solo Loop)
📍 No charge for advice or minor assistance, even without AppleCare.
When to Replace a Band
Replace if:
– The band no longer clicks securely
– Textile bands smell despite cleaning
– Metal bands show visible cracks or corrosion
Final Checklist: Remove Any Band Safely
✅ Place watch face-down on soft surface
✅ Press release button fully
✅ Slide band straight out—no twisting
✅ Match new band to correct case size
✅ Install with text facing you
✅ Listen for the click
Changing your Apple Watch band should take under 30 seconds once you’re familiar with the process. From sleek Milanese Loops to rugged Trail Loops, each band offers a unique look and feel—but they all follow the same simple removal rule: press, slide, and protect. By following this guide, you’ll keep your Apple Watch looking great and functioning perfectly for years to come.