Wearing your Apple Watch correctly is about more than looks—it’s crucial for accurate health tracking, reliable notifications, and all-day comfort. Knowing how to wear Apple Watch band properly ensures your heart rate is monitored accurately, wrist detection works smoothly, and haptic alerts are felt when they matter most. Whether you just unboxed your first Apple Watch or are switching bands for a workout or formal event, a small adjustment in fit or placement can make a big difference in performance. Many users unknowingly wear their watch too loose, on the wrong side of the wrist, or with incompatible bands—leading to missed health data, failed unlock attempts, or even skin irritation. This guide walks you through every step: from confirming band compatibility and attaching it securely, to positioning it for optimal sensor performance during daily wear, exercise, and sleep. You’ll also learn how to fasten different band types, avoid common mistakes, and maintain your band for long-term use.
Confirm Your Band Fits Your Apple Watch Size
Before attaching any band, verify it matches your Apple Watch case size. Using an incompatible band can cause poor fit, sensor misalignment, or even damage the attachment mechanism.
Match Case Size Exactly
Apple Watch bands are designed for specific case sizes: 38mm, 40mm, 41mm, 42mm, 44mm, 45mm, or 49mm (Ultra). Even a 1mm difference matters—never assume a 40mm band will fit a 44mm watch. Check the label on the band or packaging to confirm compatibility. Official Apple bands clearly state supported sizes, and most third-party bands follow the same standard.
Use Any Compatible Band Type
You can mix and match Apple bands—swap a Sport Band for a Milanese Loop—as long as the size matches. Third-party bands work too, but ensure they’re built to Apple’s specifications. Poorly made bands may have misaligned pins or weak latches that compromise security.
Never Force the Band
If a band doesn’t slide in smoothly, don’t force it. Resistance usually means the release button isn’t fully pressed or the size is wrong. Forcing the band can bend internal pins or damage the spring-loaded latch. Realign, press the button firmly, and try again.
Remove and Attach Bands Without Damage
Changing bands is quick and tool-free, thanks to Apple’s quick-release system. Do it right to protect your watch and ensure a secure connection.
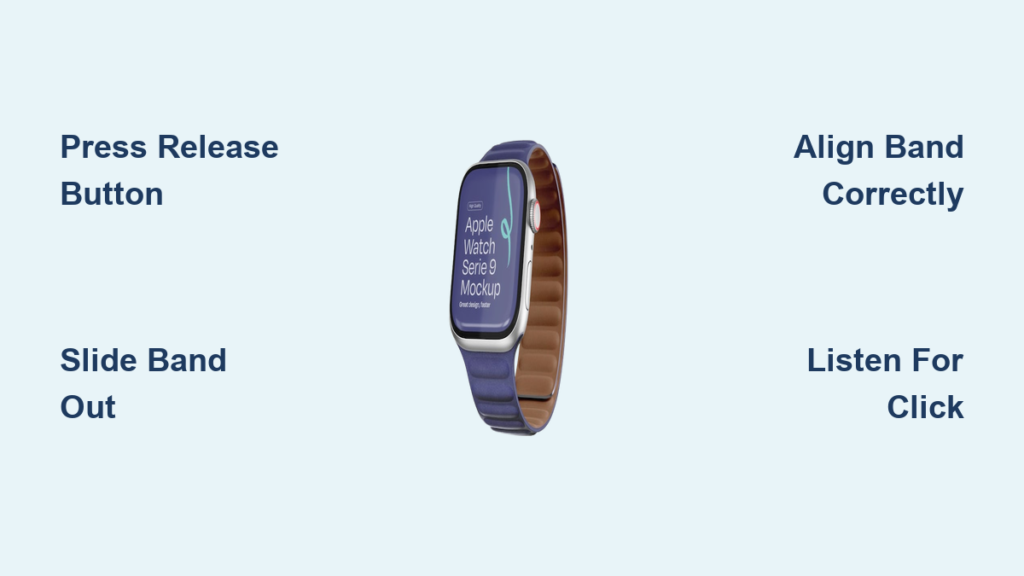
Press the Release Button Firmly
Locate the small band release button on the side of the watch case. Press and hold it with your fingertip—don’t tap it. You’ll feel a slight spring give as the internal latch retracts.
Slide Out the Old Band
While holding the button, gently pull the band straight out. It should glide out smoothly. Repeat for the other side if replacing both top and bottom bands. Avoid wiggling or twisting, which can stress the mechanism.
Insert the New Band Until It Clicks
Align the metal pins on the new band with the grooves on the watch case. Press the release button again and slide the band in until you hear a soft click. The band should sit flush against the case with no gaps or wobble.
Test the Connection
After attaching, gently tug on the band. If it moves or feels loose, remove and reinsert it. A secure fit is essential—especially during workouts or when carrying the watch daily.
Position the Watch for Accurate Sensor Readings
Where and how you wear your Apple Watch directly impacts its health and safety features. Poor placement leads to inaccurate heart rate data, failed wrist detection, or disabled haptics.
Wear on Top of the Wrist, Not Underneath
Always place the Apple Watch on the top side of your wrist. The back sensors—heart rate monitor, ECG, and haptics—need direct skin contact to function. Wearing it underneath blocks these sensors and may disable features like wrist detection.
Sit One to Two Fingers Above the Wrist Bone
Position the watch 1–2 finger widths above your wrist bone. This spot stays stable during movement and avoids pressure points that cause discomfort or chafing. Too low, and the watch may slide; too high, and it can interfere with tendons or reduce blood flow.
Keep Sensors Against Bare Skin
Never wear the watch over clothing, gloves, or medical sleeves. Even a thin fabric layer can disrupt optical heart rate readings, ECG accuracy, and haptic feedback. For best results, ensure clean, dry skin contact at all times.
Fasten the Band for Comfort and Security
The right tightness keeps your Apple Watch secure without cutting off circulation or causing irritation.
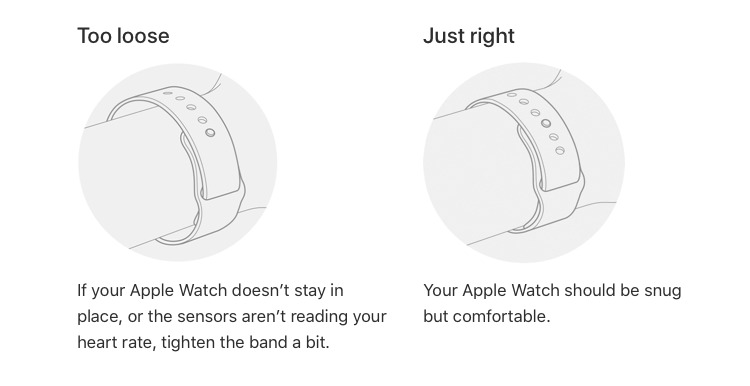
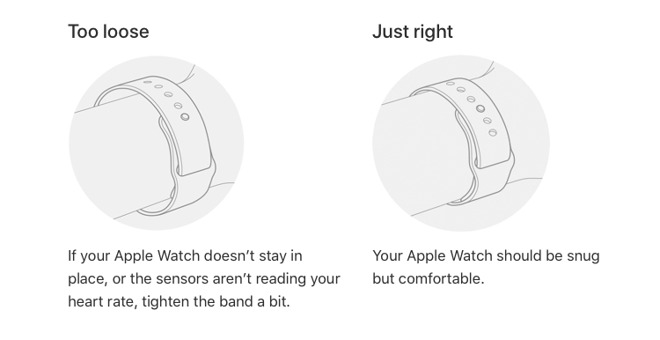
Snug but Not Tight for Daily Wear
The band should hold the watch firmly without digging in. You should be able to slip one finger underneath comfortably. This balance ensures all-day wearability while maintaining sensor contact.
Tighten Slightly for Workouts
During exercise, fasten the band a bit tighter to prevent bouncing or rotation. This improves motion tracking and heart rate accuracy during runs, weightlifting, or high-intensity intervals.
Adjust Based on Band Type
- Sport Band: Use the middle hole for a standard fit; go tighter for runs.
- Solo Loop: Choose the correct size (XS to XL) at purchase—no adjustment possible.
- Sport Loop: Pull the straps to tighten; release to loosen. Ideal for swelling during heat or long workouts.
Orient the Watch for Easy Access
Correct orientation ensures intuitive use of controls and consistent haptic feedback.
Digital Crown on the Outside of the Wrist
Wear the watch with the digital crown on the outer side of your wrist. This is the default position for right-handed users and aligns the interface for natural scrolling and button presses.
Flip Display for Left-Hand Use
Left-handed users can wear the watch on their right wrist and flip the screen. Go to Settings > Accessibility > Mirror Display to reverse the interface, making taps and swipes more comfortable.
Never Wear It Upside Down
Rotating the watch 180 degrees disables haptic alerts and confuses motion detection. The system may think the watch is off your wrist and lock automatically, disrupting notifications and tracking.
Choose the Right Band for Every Activity

Different bands enhance comfort, durability, and performance depending on your day.
Daily Use: Sport Band or Classic Buckle
For all-day wear, the Sport Band offers flexibility and sweat resistance. The Classic Buckle adds a polished look for office or casual settings.
Exercise: Nike Sport Loop or Solo Loop
The Nike Sport Loop wicks moisture and stays secure during sprints or lifting. The Solo Loop eliminates buckles, reducing snag risks and pressure points.
Sleep: Braided Solo Loop
For overnight wear, the Braided Solo Loop is soft, breathable, and comfortable for 8+ hours. It maintains sensor contact without irritation.
Formal Events: Milanese Loop or Leather Band
The Milanese Loop uses a magnetic clasp for a sleek, adjustable fit. Leather Loop or Modern Buckle bands add elegance for dinners or business meetings.
Prevent Skin Irritation and Discomfort
Long-term wear requires hygiene and care to protect your skin and band.
Clean Band Weekly
Wash Sport Bands, Loops, and Solo Bands with mild soap and water. Rinse and air dry. For leather bands, wipe with a dry cloth—never soak.
Let Skin Breathe Daily
Remove the watch for at least 30 minutes each day to let your wrist air out. This prevents moisture buildup, which can lead to rashes or contact dermatitis.
Rotate Bands Regularly
Switch between 2–3 bands to reduce friction on the same skin area. This minimizes wear patterns and extends band life.
Extend Band Lifespan with Proper Care
Protect your investment by maintaining your bands properly.
Avoid Extreme Conditions
Don’t leave bands in hot cars, under direct sunlight, or submerged for long periods. Heat degrades silicone, and UV rays fade colors and weaken fibers.
Replace Worn Bands Immediately
Inspect for fraying (especially on Sport Loops), stretched Solo Loops, or loose clasps. A damaged band may detach unexpectedly, risking your device.
Check Attachment Mechanism Monthly
Ensure the pins on the band are straight and the release button operates smoothly. Bent pins or sticky latches indicate wear and may need replacement.
Fix Common Fit and Sensor Issues
Most Apple Watch problems stem from improper band wear—and are easy to fix.
No Heart Rate Reading?
Check if the watch is too loose or worn upside down. Tighten the band and reposition it on top of the wrist. Clean the back sensors with a dry cloth.
Wrist Detection Keeps Failing?
This usually means insufficient skin contact. Clean the sensors and reposition the watch higher on the wrist. Avoid wearing it over sleeves or gloves.
Haptics Not Working?
If you don’t feel taps, the watch may be worn underneath the wrist. Flip it over so the display faces up and the crown is on the outside.
Watch Slides During Workout?
Switch to a Nike Sport Band or Solo Loop and fasten tighter. Avoid smooth leather bands during intense activity.
Summary: Key Steps to Wear Apple Watch Band
| Step | Action |
|---|---|
| 1 | Confirm band matches your watch size (40mm, 44mm, etc.). |
| 2 | Press release button and slide out old band. |
| 3 | Insert new band until it clicks securely. |
| 4 | Wear on top of wrist, 1–2 fingers above bone. |
| 5 | Fasten snugly—one finger should fit underneath. |
| 6 | Keep digital crown on the outer side of wrist. |
| 7 | Ensure sensors touch bare skin at all times. |
Properly wearing your Apple Watch band boosts comfort, accuracy, and device longevity. Whether you’re tracking a marathon or wearing it to a meeting, the right fit makes all the difference. Rotate bands, clean regularly, and always prioritize skin contact for seamless performance. For illustrated guides, visit Apple’s official support pages: Wearing your Apple Watch and Change your Apple Watch band.