You’re at a coffee shop, hands full with a tote bag and your phone buried at the bottom. You reach the counter—no wallet. No stress. Just a quick double-click of the side button on your Apple Watch, and you’re paying in seconds. This is the reality of Apple Pay on Apple Watch, a feature so seamless, so secure, and so underused that millions of users are missing out on one of the most convenient tools in modern tech.
Since its debut in 2015, Apple Pay has evolved from a novelty to a necessity. But while many know they can pay with their watch, few know how to use it effectively, avoid common mistakes, or unlock its full potential. Whether you’re a new Apple Watch owner or a long-time user who’s never tried it, this guide walks you through everything: from adding your first card to riding subways, withdrawing cash, and even using your wrist as a boarding pass. Let’s turn your Apple Watch into a true digital wallet.
Add a Card to Apple Watch Using Your iPhone
Open Wallet & Apple Pay in the Apple Watch App
Before your watch can pay, you need to add a card—and that starts on your iPhone. Open the Apple Watch app, tap Wallet & Apple Pay, then select Add Card. You can add credit, debit, or prepaid cards from most major banks and credit unions.
Important: Apple Watch doesn’t support standalone card addition. All cards must be added through the paired iPhone.
Scan or Manually Enter Card Details
Use your iPhone’s camera to scan the card for instant input, or enter the card number, expiration date, and CVV manually. After submission, your bank will verify your identity—this could be via SMS, a phone call, in-app login, or an email link.
Complete Bank Verification
Verification times vary. Some approvals happen instantly; others take hours. If the process fails, ensure your devices are updated to the latest iOS and watchOS versions. Restart both iPhone and Apple Watch, then try again.
Some banks block Apple Pay on certain card types (like corporate or prepaid cards), so contact your issuer if stuck. Deleting and re-adding the card after 24 hours can also resolve glitches.
Set a Default Payment Card
Once verified, your card appears in the Wallet app on your Apple Watch. Tap and hold to reorder cards—drag your most-used one to the front. This becomes your default card, appearing instantly when you double-click the side button.
Pro Tip: Set a default to avoid fumbling through cards at checkout. You can always scroll with the Digital Crown to switch.
Make In-Store Payments in Seconds
Activate Apple Pay With a Double-Click
At the register, double-click the side button below the Digital Crown. Your default card appears—no passcode, no Face ID, no phone required. This is faster than unlocking your iPhone, especially with gloves or masks.
Note: The watch must be on your wrist and unlocked. If removed, it locks automatically and won’t work.
Scroll to Switch Cards
If you have multiple cards, turn the Digital Crown to cycle through them before tapping the terminal. This is perfect for switching between a rewards card and a travel card on the fly.
Tap Your Watch to the Payment Terminal
Hold the back of your Apple Watch near the contactless reader (look for the NFC or Apple Pay symbol). Keep the display facing the terminal, within 2–4 cm. Don’t press the screen—this can scratch it.
User Tip: Even without Wi-Fi, cellular, or Bluetooth, Apple Pay works. It uses NFC and stores encrypted card data locally—so you can pay anywhere, anytime.
Confirm the Transaction Is Complete
A gentle tap vibration and beep mean the payment started. When a checkmark and “Done” appear, it’s confirmed. A notification shows up in your Watch’s Notification Center shortly after.
Use Express Transit for Faster Commutes
Enable Express Transit Mode in Settings
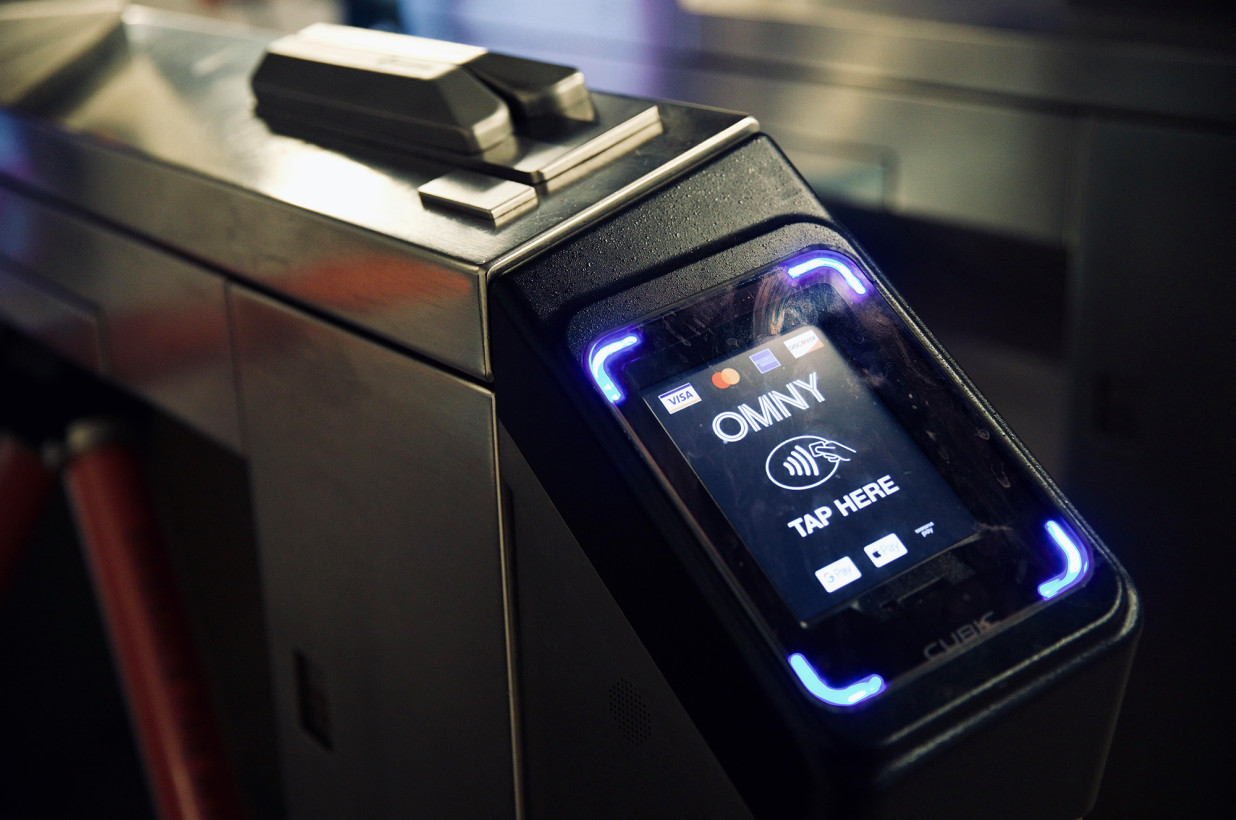
In cities with contactless public transit, Express Transit lets you tap in without double-clicking. Open the Apple Watch app on iPhone, go to Wallet & Apple Pay > Express Transit, then choose your default transit card—like OMNY (NYC), Oyster (London), or Suica (Tokyo).
Note: You can only set one transit card as Express Transit. Non-transit cards should not be set as default to avoid accidental charges.
Tap and Go Without Unlocking
With Express Transit enabled, simply hold your watch to the reader—no button press needed. The watch vibrates and flashes a green light to confirm. Ideal for crowded stations or when your hands are full.
Check If Your City Supports It
Supported systems include:
– New York City (MTA/OMNY)
– London Underground
– Tokyo Metro (Suica/Pasmo)
– Sydney (Opal)
– Paris (Navigo)
– Toronto (Presto)
– San Francisco (Clipper)
Check Apple’s official list for full coverage. Some terminals are on the right—adjust your wrist position accordingly.
Pay in Apps and Online Using iPhone + Watch
Select Apple Pay at Checkout
When buying in Safari or an app on your iPhone, choose Apple Pay at checkout. Review shipping, billing, and card details on your phone.
Approve With a Double-Click on Your Watch
Instead of Face ID, double-click the side button on your Apple Watch to confirm. A haptic pulse confirms success. The watch acts as an authenticator—no need to touch your phone.
Limitation: Apple Watch can’t start online purchases. It only verifies transactions initiated on the paired iPhone.
Withdraw Cash at NFC-Compatible ATMs
Find Apple Pay-Enabled ATMs
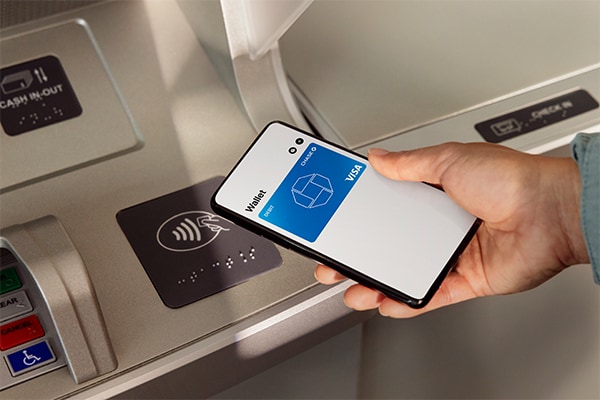
Some banks support contactless ATM withdrawals. Look for the Apple Pay or NFC symbol on the machine. Supported networks include Chase, Bank of America, and TD Bank in the U.S. and Canada.
Tap Your Watch to Withdraw
- Double-click the side button
- Hold the watch near the contactless pad
- Follow prompts on screen
- Enter your PIN using the keypad if required
Note: As of now, UK ATMs do not support tap-to-pay withdrawals. Availability in other regions depends on your bank.
Store More Than Just Payment Cards
Add Loyalty and Rewards Cards
Use the Wallet app to store Target Circle, Walgreens Balance Rewards, or Starbucks. These often auto-populate at checkout when near a store.
Save Boarding Passes and Event Tickets
Add flight itineraries or concert tickets to Wallet. At airports, show your Apple Watch at security and boarding gates. For theme parks, tap to scan—no phone needed.
Use Digital Driver’s License (Select States)
In Arizona, Georgia, Maryland, and others, you can store a digital driver’s license and present it at TSA checkpoints. Some users have even used it at DMV offices.
Unlock Cars and Smart Locks
With compatible models (e.g., BMW, Genesis), your Apple Watch can unlock your car or home. Pair via the manufacturer’s app—no key fob needed.
Keep Your Payments Secure
How Apple Pay Protects You
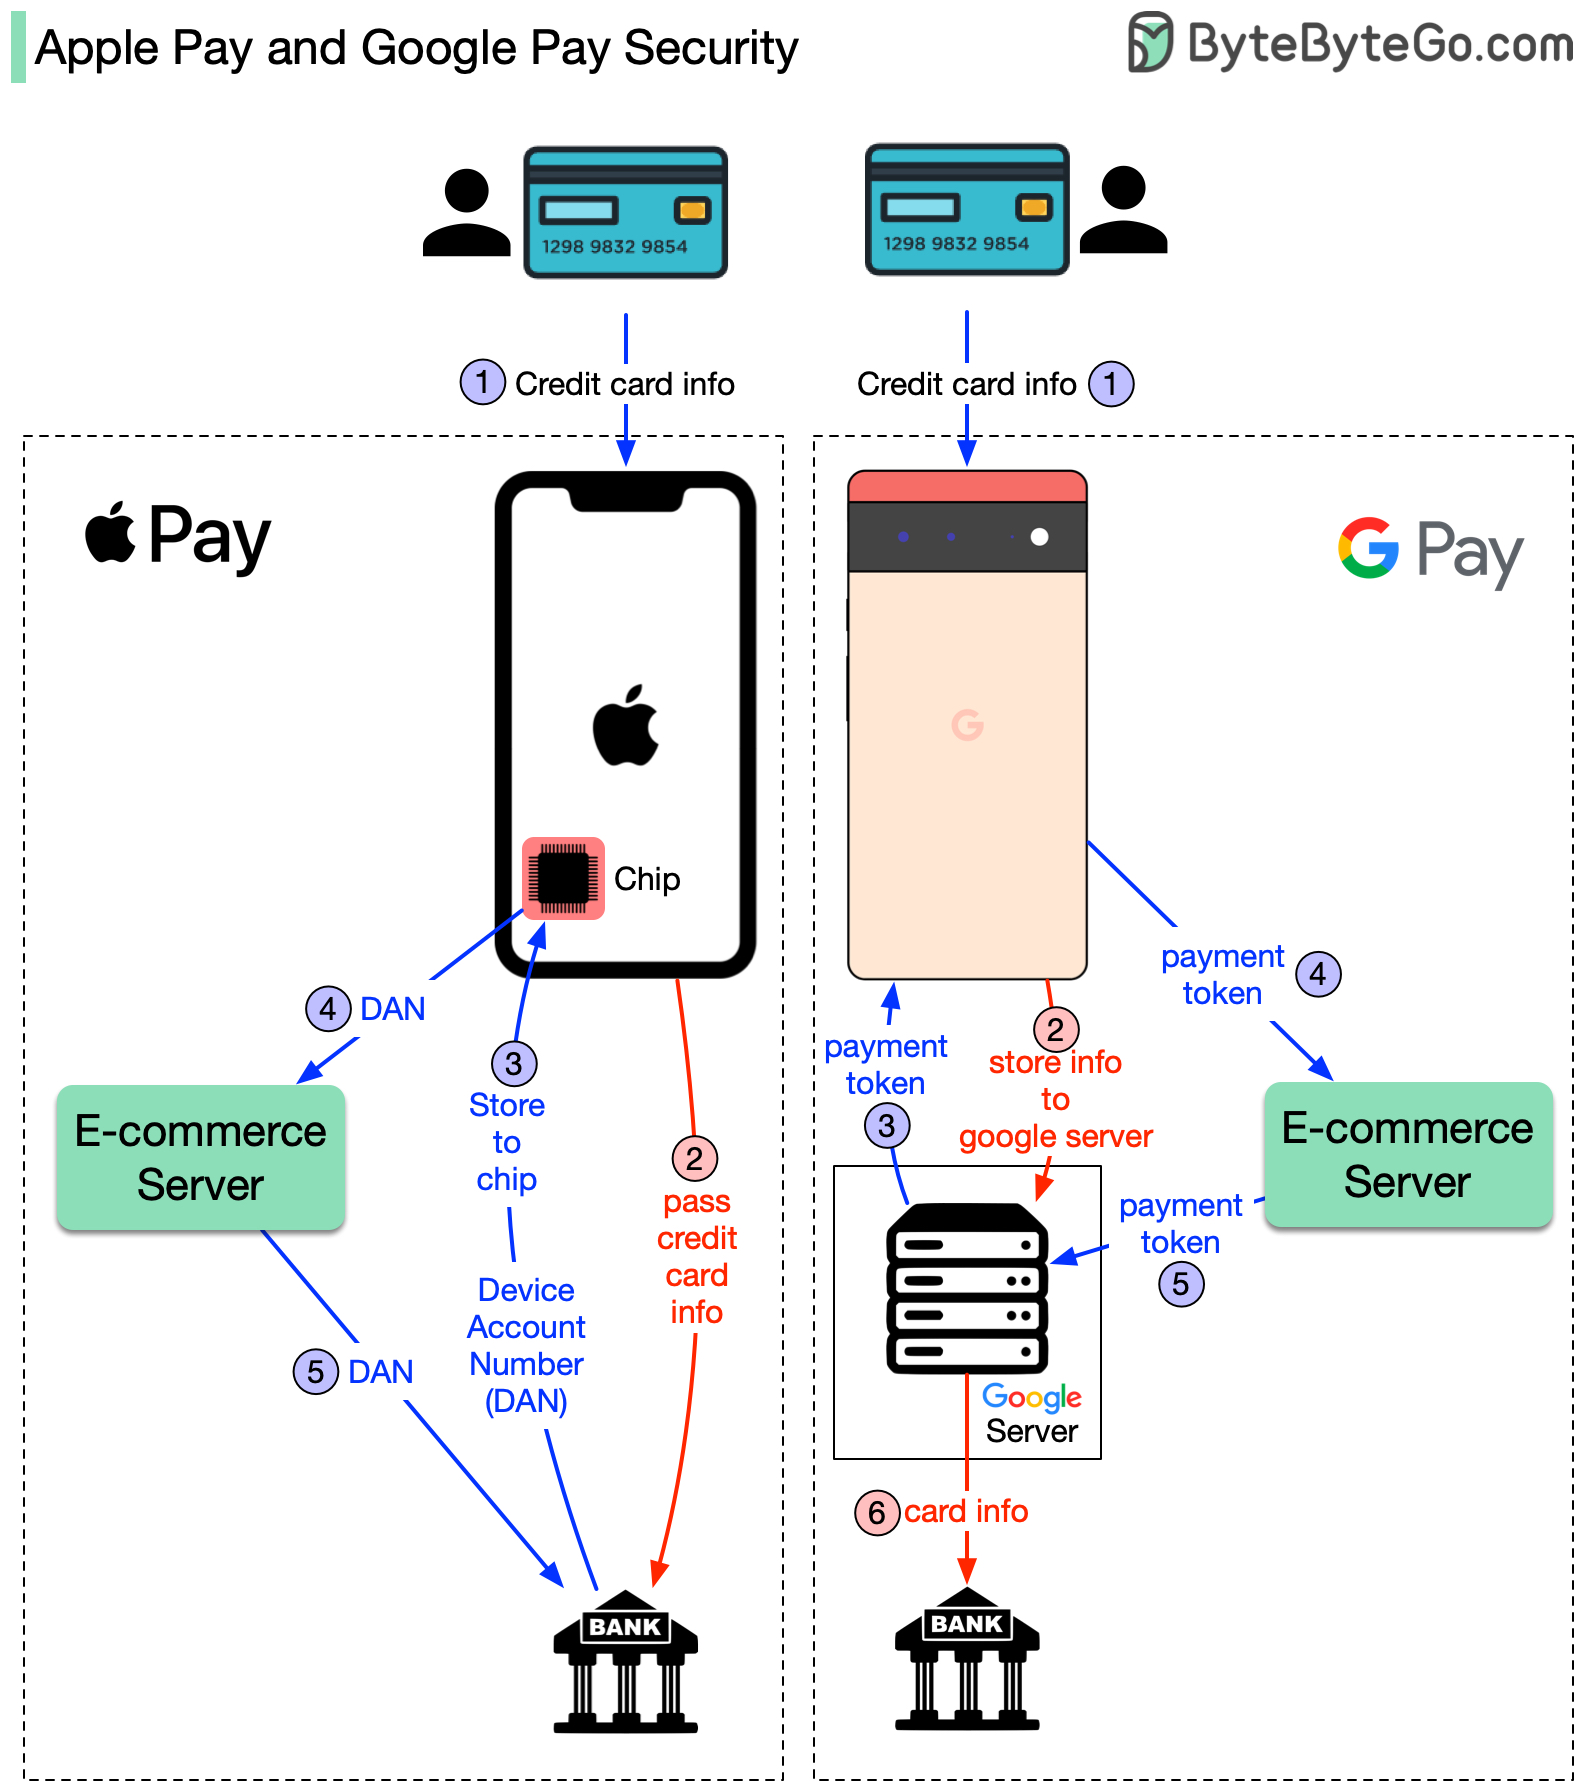
Every transaction uses tokenization—your real card number is never shared. A unique Device Account Number (DAN) is stored in the Secure Element chip, and each payment includes a one-time dynamic code.
Watch Must Be Worn and Unlocked
Apple Pay only works when the watch is on your wrist and unlocked. If removed, it locks and requires a passcode.
Disable Payments Remotely
If lost, open the Find My app or visit iCloud.com, mark it as Lost Mode, and suspend Apple Pay instantly.
Debunk Common Myths
- Myth: “I might pay by accident.”
Truth: You must double-click intentionally. Only Express Transit cards work without it. - Myth: “It’s risky to store cards.”
Truth: Apple doesn’t store your card number. All data is encrypted and isolated.
Fix Common Apple Pay Issues
Can’t Add a Card?
Try:
– Restart both devices
– Update to latest software
– Confirm your bank supports Apple Pay
– Contact your issuer if verification fails
Payment Not Working?
- Ensure the watch is on your wrist and unlocked
- Hold flat and steady near the terminal
- Avoid metal watch bands—they can block NFC
- Try another terminal or card
Transactions Not Syncing?
Open the Wallet app on iPhone to force a sync. Most update within 24 hours.
Accidental Transit Taps?
Avoid setting credit cards as Express Transit. Use a dedicated transit card.
Optimize Your Experience
Set a Default Card
Reduces friction—your go-to card appears instantly.
Remove Old or Unused Cards
Keep Wallet clean and navigation fast.
Use a Screen Protector
Products like Magic John protect against scratches without blocking NFC.
Enable Find My Watch
Allows remote locking and tracking.
Know Regional Differences
Apple Pay works in over 60 countries, including the U.S., UK, Canada, Japan, and Germany. But adoption varies.
- Walmart: Still blocks Apple Pay in many U.S. stores
- Albertson’s: Some locations have broken NFC
- WinCo Foods: Recently added full support
- Gas Stations: Most modern pumps accept it
User Note: “Looking at you Walmart 😑” — reflects ongoing U.S. retail gaps.
Why Users Love Apple Watch Over iPhone
- Faster than Face ID, especially with gloves
- Leave your phone behind for quick errands
- Ideal for drive-thrus and motorcycles
- Becomes a natural reflex with regular use
One user said: “It’s the coolest feeling ever, drive-thrus also haha.”
When iPhone Might Be Better
- Phone already in hand for shopping lists
- Thick winter gloves block wrist access
- Awkward terminal placement (right-side readers)
- Delayed transaction syncing
Future of Apple Pay on Watch
Kids under 18 can’t add credit cards directly. But parents can use Apple Cash via Family Sharing to send money.
Expect more digital IDs, health cards, and car keys—all manageable from your wrist.
Best Practices Summary
| Task | Tip |
|---|---|
| Add a card | Use iPhone Watch app; verify with bank |
| Pay in store | Double-click, tap, wait for checkmark |
| Use transit | Enable Express Transit; tap without unlocking |
| Stay secure | Use passcode; enable Find My |
| Fix issues | Restart; avoid metal bands |
| Optimize | Set default; use screen protector |
Apple Pay on Apple Watch is a powerful, secure, and underused tool. From coffee runs to subway rides, your wrist can do it all. Now that you know how—start tapping. Your future self will thank you.