Swapping your Apple Watch Series 8 band is one of the fastest and most effective ways to refresh your look, improve comfort, or prepare for a new activity—whether it’s a morning run, a business meeting, or a weekend getaway. The best part? You don’t need any tools. Apple’s intuitive quick-release mechanism makes changing bands a seamless process that takes less than a minute once you know how.
With the Series 8, Apple continues its universal band design, meaning all bands designed for 41mm or 45mm models (and compatible sizes) work flawlessly. Whether you’re switching from a Sport Band to a Milanese Loop or upgrading to a third-party favorite like the Snap Duo, this guide will walk you through every step—from safely removing your current band to securely attaching a new one, avoiding common mistakes, ensuring compatibility, and keeping your bands in top shape.
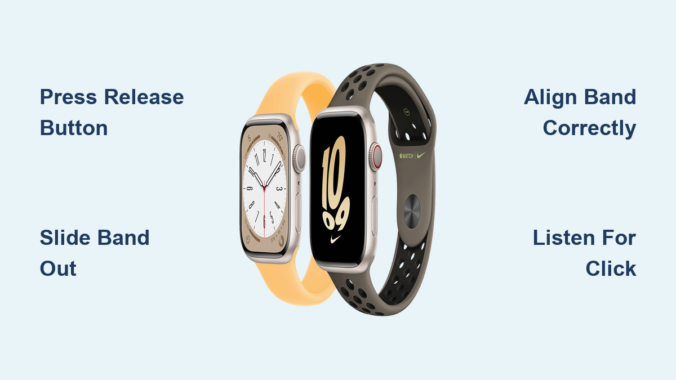
Locate the Release Mechanism on Your Series 8
Before removing any band, you need to find the release mechanism. On both sides of your Apple Watch Series 8, near the base of the band connectors, you’ll see a small oval-shaped button recessed into the case. This is the quick-release pin, a spring-loaded latch that holds the band in place.
Flip your watch over so the back is facing up. Look closely at where the band meets the case. Pressing this button disengages the internal lock, allowing the band to slide out horizontally. No prying, no tools—just firm, straight pressure from your fingertip or fingernail.
Press and Hold the Button Fully
To begin removal, press and hold down the release button on one side of the watch. It’s crucial to press it all the way in—there’s a slight “give” when the latch disengages.
- Use your thumb or the edge of your fingernail for better leverage.
- Press straight in—don’t angle your finger, as this can prevent full depression.
- Keep constant pressure while sliding the band out.
If nothing moves, don’t force it. Double-check that you’re pressing deep enough. The mechanism only unlocks when the button is fully depressed. Forcing the band without proper release can damage the internal spring or connector pins.
Slide Band Out Horizontally
With the release button held down, gently slide the band straight out from the case.
- Move it parallel to the screen—never pull upward or twist.
- Apply light, steady pressure along the track.
- If the band feels stuck, try a slight side-to-side wiggle while maintaining pressure on the button.
Repeat the process on the opposite side to fully detach the band. Once both ends are removed, take a moment to inspect the connector slots on the watch body. Dust, lint, sweat, or pocket debris can accumulate here over time. Use a dry microfiber cloth to wipe the area clean before attaching a new band—this ensures a smooth, secure fit.
Attach Your New Band Correctly and Securely

Installing a new band is just as simple, but precision matters. A poorly aligned or half-clicked band can pop off unexpectedly, especially during movement.
Align Band with Case Grooves
Take your new band and line up the connector end with the grooves on the Series 8 case.
- Make sure the band is oriented correctly: logos, text, or buckles should face outward.
- The metal or plastic lugs on the band must sit flush with the slot.
- For loop-style bands (Sport Loop, Braided Loop), ensure the smooth, sensor-facing side rests against the back of the watch.
Do not angle or force the band into place. If it doesn’t slide in easily, remove it and recheck alignment. Forcing can damage both the band and the watch lugs.
Slide Until You Hear a Click
Push the band straight in until it clicks securely into place.
- Apply gentle, even pressure—no snapping or jerking.
- You should hear or feel a soft audible click when the latch engages.
- The band should sit flush with the case, with no visible gaps.
Repeat on the other side: press the release button, align the second end, and slide it in until it clicks. Once both sides are attached, gently tug on each end to confirm the band is locked. If it moves or feels loose, remove and reattach it—proper seating is essential for safety and sensor performance.
Verify Band Compatibility Before You Buy

Not all bands fit all Apple Watches. Using the wrong size can lead to misalignment, poor fit, or even damage.
Match Case Size: 41mm or 45mm
The Apple Watch Series 8 comes in two sizes:
– 41mm
– 45mm
Bands are cross-compatible within size groups:
– Small/Medium Group: 38mm, 40mm, 41mm
– Large Group: 42mm, 44mm, 45mm, 49mm (Ultra)
✅ A 41mm band fits only 41mm Series 8 models.
✅ A 45mm band fits only 45mm Series 8 models.
Always check the product description or packaging to confirm compatibility. Using a 40mm band on a 45mm watch won’t work—and vice versa.
Confirm Third-Party Band Standards
Many third-party bands are high-quality, but not all are created equal.
Look for:
– “Designed for Apple Watch” certification
– Precision-cut lugs that match Apple’s dimensions
– No wobbling or side-to-side movement when attached
Avoid ultra-cheap bands with oversized or flimsy connectors. These can wear down the release mechanism over time or fail during use.
Troubleshoot Common Band Issues Fast
Even with a simple system, problems can happen. Here’s how to fix them:
Band Won’t Slide Out
Cause: Button not fully pressed or debris blocking the slot.
Fix: Press deeper and hold. Clean the connector with a dry cloth. Shine a light to check for lint.
New Band Won’t Click In
Cause: Wrong orientation or misalignment.
Fix: Flip the band—logos should face out. Reinsert with the release button pressed. Try the other side first.
Band Feels Loose or Wobbly
Cause: Incomplete insertion or worn connector.
Fix: Detach and reattach firmly. Inspect for damage. If it persists, stop using and contact Apple Support.
Sensors Not Working After Swap
Cause: Poor contact with the back of the watch (especially heart rate sensors).
Fix: Reattach band, ensuring it’s flush. Clean sensor windows on both band and watch. Note: Leather and metal bands don’t have sensors.
Choose the Right Band Size for Comfort
A well-fitting band enhances comfort, accuracy, and security.
Use S/M or M/L Lengths
Most bands come in:
– S/M: Fits wrists 130–180mm
– M/L: Fits 150–220mm
If you’re between sizes, go S/M for snugness, M/L for flexibility—especially if you have a hairy wrist or wear it over clothing.
Size Loop Bands Accurately
Solo Loop, Braided Loop, and Sport Loop are seamless and stretchable.
Apple recommends:
– Sizing down if between sizes for a secure fit.
– Using Apple’s online sizing tool with a paper strip or measuring tape.
To measure:
1. Wrap a non-stretch string around your wrist bone.
2. Mark and measure the length.
3. Match to Apple’s size chart (S, M, L, etc.).
Too tight? It’ll pinch. Too loose? It may slip during movement.
Maintain Your Bands for Longevity
Proper care keeps bands looking fresh and prevents irritation.
Clean After Every Use
- Silicone (Sport Band): Wipe with damp cloth or rinse with mild soap.
- Fabric (Nylon, Braided Loop): Hand wash, air dry flat.
- Leather: Dry cloth only—never wet.
- Metal: Soft cloth; avoid magnets.
Avoid alcohol, bleach, or abrasive cleaners—they degrade materials.
Store Properly Off-Wrist
- Lay flat or loosely roll—don’t crease.
- Store in a cool, dry place away from sunlight.
- Rotate bands to reduce wear and sweat buildup.
Recommended Bands for Series 8
Snap Duo Watch Band
- Material: Soft, pebbled silicone
- Design: Reversible—two colors in one
- Closure: Magnetic sport buckle
- Features: Sweat/water-resistant, tool-free install
- Sizes: S/M, M/L
- Compatibility: All Apple Watch models
Perfect for active users who want style variety without multiple bands.
Other Great Options
- Sport Band: Lightweight, breathable
- Milanese Loop: Elegant, magnetic closure
- Classic Buckle: Genuine leather, formal wear
- Solo Loop: Seamless knit, all-day comfort
Choose based on your lifestyle—each offers unique benefits.
Final Tips for Safe Band Swapping
- Power off your watch (optional but safer).
- Work on a soft, clean surface.
- Never force the band—check alignment first.
- Listen for the click—it confirms a secure lock.
- Rotate bands regularly to extend life.
Changing your Apple Watch Series 8 band is more than a simple upgrade—it’s a way to personalize your device daily. With the right technique, compatible band, and regular care, your watch stays secure, stylish, and perfectly suited to your life. Whether you’re dressing up, working out, or just refreshing your look, a new band takes seconds and makes all the difference.
Leave a Reply