Setting up your Apple Watch should be a seamless experience—but when it doesn’t go as planned, confusion and frustration can quickly build. Whether you’re pairing your Apple Watch for the first time, moving it to a new iPhone, or troubleshooting a failed connection, this Apple Watch pairing guide gives you everything you need to get things working fast. From initial setup steps to solving common errors like Activation Lock, frozen screens, or missing pairing animations, we’ll walk you through every scenario with clear, step-by-step instructions.
You’ll learn how to pair your watch in minutes, restore your data safely, and avoid critical mistakes that could leave your device unusable. Let’s get your Apple Watch connected, configured, and ready to track, notify, and protect—just like it was designed to do.
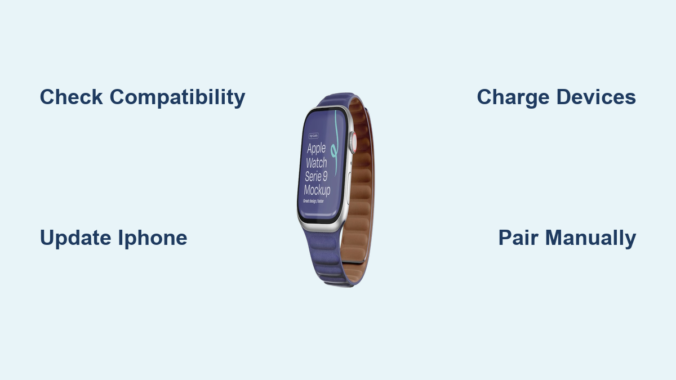
Confirm Your Device Compatibility

Before starting, ensure your devices meet Apple’s latest requirements—otherwise, setup will fail.
Check Supported Models and Software
To pair successfully, your devices must meet these minimum specs:
- Apple Watch: Series 6, SE, Ultra, Ultra 3, Series 11, SE 3, or newer
- iPhone: iPhone 11 or later
- Software: iOS 26 and watchOS 26 or later
Older Apple Watch models may work with earlier iPhones, but the newest watches require up-to-date hardware and software.
If you’re unsure what you have:
– Identify your Apple Watch at support.apple.com/identifying-your-apple-watch
– Identify your iPhone at support.apple.com/identifying-your-iphone
Skipping this check is one of the top reasons pairing fails—don’t risk it.
Prepare for Pairing: Essential Pre-Setup Steps
A smooth setup starts with preparation. Follow this checklist to avoid interruptions.
Update Your iPhone
An outdated iPhone can block pairing entirely.
- Open Settings > General > Software Update
- Install any available iOS updates
- Wait for the update to complete and restart if needed
Never skip this—iOS updates often include critical fixes for Apple Watch connectivity.
Turn On Key Connectivity Features
Your iPhone and Apple Watch need to communicate wirelessly.
- Ensure Bluetooth is on (check Control Center)
- Connect to Wi-Fi or confirm strong cellular signal
- Disable Airplane Mode if active
Keep your iPhone unlocked during setup—locking it can interrupt the process.
Charge Both Devices
Low battery is a common cause of mid-setup failure.
- Charge both devices to at least 50%
- Use the original magnetic charger for your Apple Watch
- Avoid power-saving modes that could limit background processes
Gather Your Account Information
Have these ready:
– Your Apple ID and password
– Previous Apple Watch passcode (if restoring)
– Family member details (for Family Setup)
Enable Accessibility If Needed
Visually impaired users can use built-in tools:
– Turn on VoiceOver or Zoom before starting
– Learn more: Use VoiceOver, Use Zoom
Start the Apple Watch Pairing Process
Now that everything’s ready, it’s time to begin.
Power On Your Apple Watch
- Press and hold the side button until the Apple logo appears
- If unresponsive, connect to the charger for 15 minutes and try again
- Once on, wear it snugly on your wrist
Fully drained watches may take several minutes to wake.
Launch Pairing on Your iPhone
- Hold your unlocked iPhone near the Apple Watch
- Wait for “Use your iPhone to set up this Apple Watch” to appear
- Tap Continue
No Animation? Start Manually
If the camera pairing screen doesn’t appear:
– Open the Apple Watch app
– Tap All Watches > Add Watch (or Start Pairing)
– Follow the prompts
This bypasses the camera method and uses Bluetooth directly.
Complete the Bluetooth Pairing
Now finalize the wireless connection.
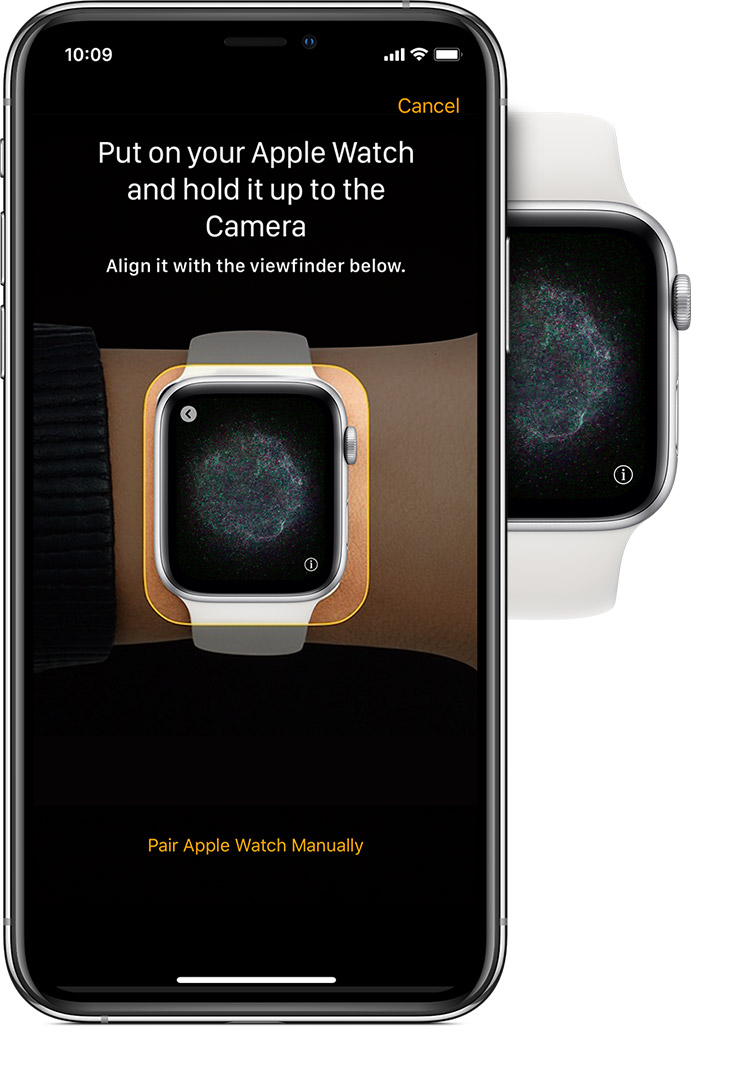
Use the Camera to Pair (Fastest Method)
- Position your iPhone so the animated watch face is centered in the viewfinder
- Keep both devices steady
- Wait for “Your Apple Watch is paired” confirmation
- Tap Continue
Good lighting helps—avoid glare or dark rooms.
Pair Manually If the Camera Fails
- Tap Pair Apple Watch Manually on your iPhone
- On the Apple Watch, tap Pair Manually
- Enter the six-digit code shown on the watch into your iPhone
This method works even with damaged screens or poor lighting.
Choose Your Setup Type
Decide how to configure your watch.
Set Up for Myself
- For personal use
- Starts fresh with default settings
- Best for first-time users
Set Up for a Family Member
- For children or dependents
- Allows different cellular carriers
- Parental controls apply
Family Setup supports up to five watches per Apple ID.
Select Your Data Transfer Option
How do you want your data handled?
Option A: Set Up as New Apple Watch
- Wipes the slate clean
- No app or data migration
- Ideal for performance and stability
Recommended unless you need old workouts or app settings.
Option B: Restore from Backup
Available if:
– You previously used an Apple Watch with the same Apple ID
– A backup exists on your iPhone or iCloud
Use Express Setup (Fastest Restore)
- Tap Apps & Data and Settings
- Confirm the preview
- Tap Continue
Transfers most settings automatically.
Customize Backup Selection
Tap Customize Settings to:
– Choose a specific iCloud or iPhone backup
– Manually restore health data (requires iCloud Health enabled)
Missing iCloud Health sync? You may lose fitness history.
Finalize Your Apple Watch Configuration

Walk through the last setup steps.
Set Wrist Preference
Choose left or right wrist—this affects screen orientation and gesture direction.
Accept Terms and Conditions
Read and tap Agree—required for all new setups.
Sign In to Apple ID
Enter your Apple ID password when prompted.
For GPS + Cellular models: You must sign in to iCloud to use phone-number-based features like calls and messages.
Activation Lock Appears?
- The watch is linked to an Apple ID
- Enter the original email and password
- For secondhand watches: Contact the previous owner to remove it via iCloud.com/find
Never buy a used Apple Watch without confirming Activation Lock is off.
Create a Passcode
- Tap Create a Passcode on iPhone
- Enter 4–6 digits on your Apple Watch
- Confirm
Skipping this means losing:
– Apple Pay access
– Activation Lock protection
– Full data security
Adjust Display Settings
- Choose text size
- Toggle bold text for better contrast
Update Health Profile
Enter:
– Date of birth
– Height and weight
– Gender and activity level
Ensures accurate heart rate zones, calorie burn, and workout tracking.
Enable Safety Features
Turn on:
– Noise alerts (protects hearing)
– Irregular rhythm notifications (if ECG-enabled)
– Emergency SOS
– Fall Detection (Ultra and Series 4+)
Test emergency features in safe environments.
Configure Model-Specific Tools
GPS + Cellular Models
- Set up cellular service during or after setup
- Carrier must match iPhone (except in Family Setup)
- Not available in all regions
Contact your carrier if activation fails.
Gesture-Enabled Models
Learn:
– Wrist flick to scroll
– Double-tap between thumb and index finger
– Adjust sensitivity in Accessibility
Apple Watch Ultra
Customize:
– Action button (Flashlight, Workout, Compass)
– Depth app (for diving)
– Siren (test volume)
These shortcuts save crucial seconds in emergencies.
Set Up Apple Pay
- Tap Add Card in Wallet
- Scan or enter card details
- Verify with your bank
Requires a passcode. Works with Visa, Mastercard, Amex, and Apple Card.
Sync and Complete Setup
Let the devices sync for full functionality.
Keep Devices Close
- Place Apple Watch on charger
- Keep iPhone within 6 inches
- Avoid using other apps during sync
Sync time: 10–30 minutes, depending on data size.
Wait for Completion
Sync ends when:
– The watch face appears on your Apple Watch
– A Done button appears on your iPhone
Then:
1. Tap Done on iPhone
2. Tap Start on Apple Watch
Access Setup Tips
While syncing:
– Tap Get to Know Your Watch on iPhone
– View tutorials on gestures, apps, and controls
Later: Find content in the Apple Watch app > Discover tab.
Final Note: A successful apple watch pairing guide doesn’t just tell you the steps—it prepares you for what can go wrong and how to fix it. Now you can set up your watch with confidence, transfer it safely, and troubleshoot nearly any issue. Keep both devices updated, always unpair before selling, and never skip Apple ID sign-in for cellular features. With this guide, your Apple Watch is ready to perform—every day, exactly as designed.
Leave a Reply