If your Apple Watch Series 10 wrist temperature isn’t working, you’re not alone. Despite being one of the standout health features of the latest model, many users report that wrist temperature tracking fails to activate or display data—even after wearing the watch every night for weeks. This issue is especially common under watchOS 11 and 11.2, affecting not just the Series 10 but also Series 8 and Ultra 2 models. The problem isn’t always hardware-related; in most cases, it’s due to strict software requirements that Apple doesn’t clearly communicate. The wrist temperature sensor only records data under very specific conditions—primarily automatic activation of Sleep Focus via a scheduled bedtime—and if any part of the setup fails, no data will be collected. This guide walks you through every verified fix, common pitfalls, and workarounds so you can finally get your Apple Watch 10 wrist temperature working—or understand why it’s still not.
Confirm Your Apple Watch 10 Supports Wrist Temperature
Check Device Compatibility
Wrist temperature tracking is only available on select Apple Watch models:
– Apple Watch Series 8 and later
– All Apple Watch Ultra models
– Apple Watch Series 10 (fully supported)
It is not available on Apple Watch SE or any model before Series 8. Since you own a Series 10, your device does support this feature—so the issue lies in setup, software, or configuration.
Verify Required Software Versions
Ensure both your devices meet minimum OS requirements:
– watchOS 9 or later (watchOS 11 recommended)
– iOS 16 or later on your iPhone
Many users report losing functionality after updating to watchOS 11.2, suggesting a software regression or bug. If your temperature tracking stopped working after an update, this could be the root cause.
Pro Tip: Check for updates by going to Watch app > General > Software Update on your iPhone.
Enable Wrist Temperature Access in Settings
Turn On Wrist Temperature in the Health App
Even with perfect sleep tracking, no data will be recorded unless wrist temperature is explicitly enabled:
1. Open the Health app on your iPhone
2. Tap Browse > Temperature
3. Select Wrist Temperature
4. Toggle on “Share With Apple Watch”
If this setting is off, the watch won’t collect any data—regardless of how many nights you wear it.
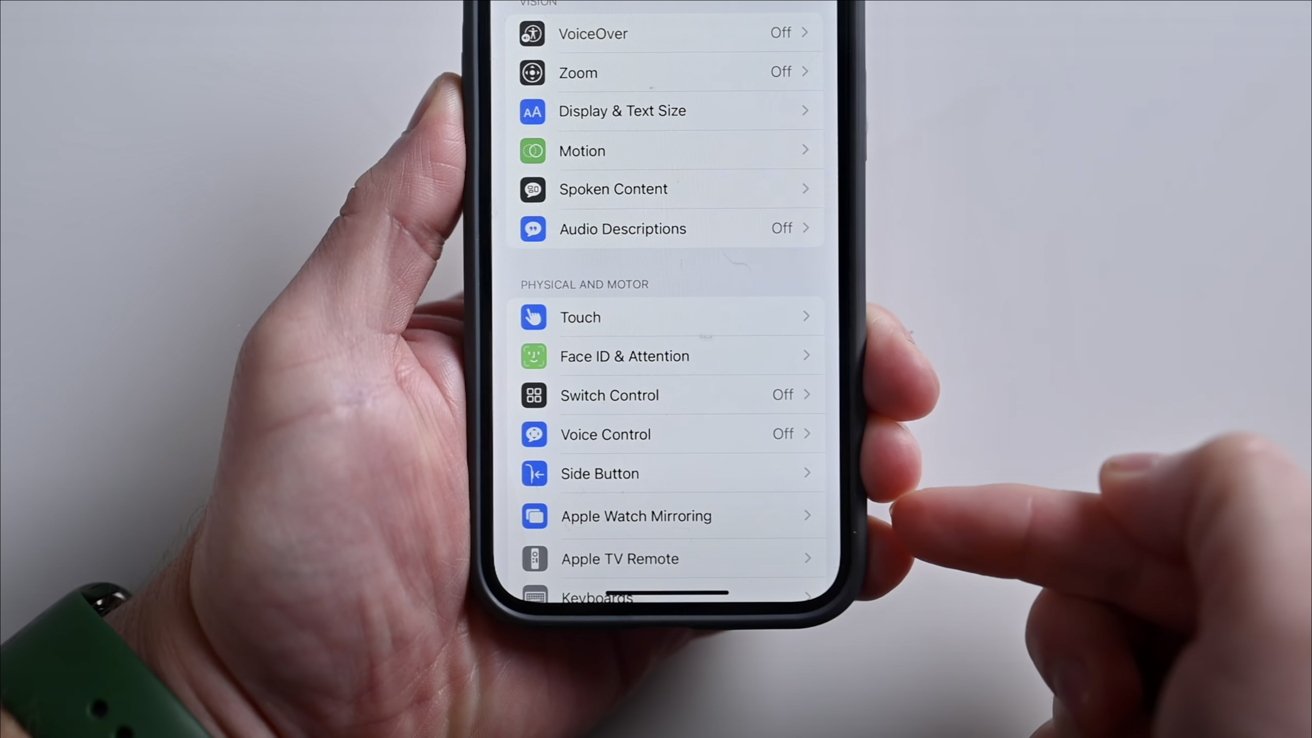
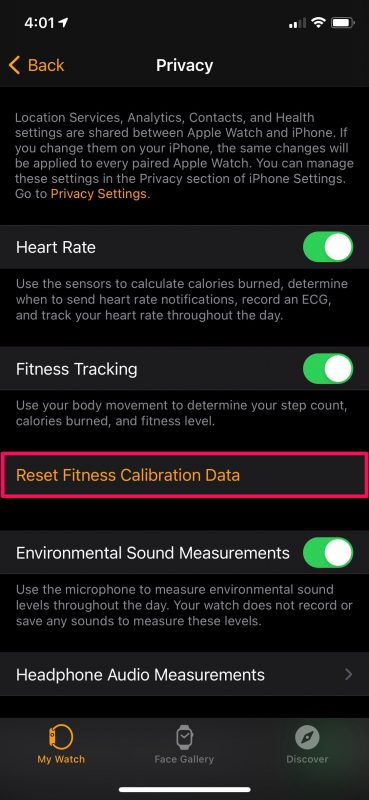
Grant Sensor Permission in Privacy Settings
Apple requires explicit permission for health sensors:
1. Open the Watch app on your iPhone
2. Go to Privacy > Wrist Temperature
3. Ensure “Allow” is enabled
Some users find that toggling this off, restarting the watch, then re-enabling it temporarily restores function—suggesting a sync bug.
Set Up a Sleep Schedule That Triggers Automatically
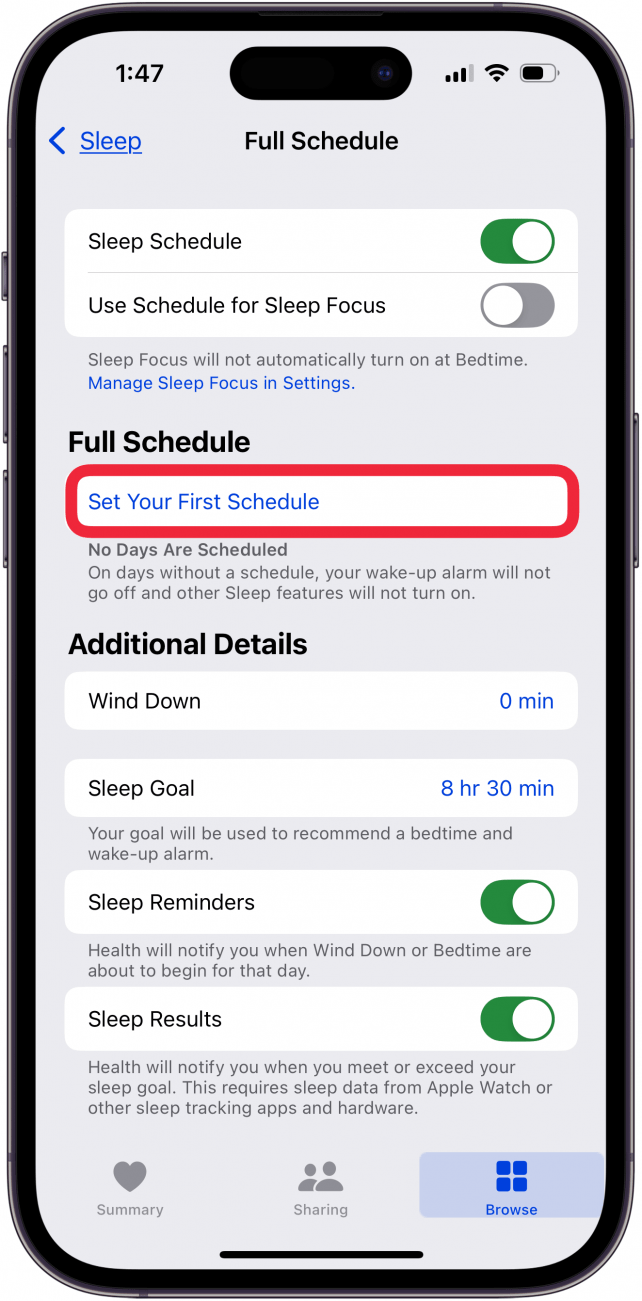
Create a Consistent Sleep Routine
Wrist temperature is only measured during scheduled sleep periods. To enable tracking:
1. Open the Health app > Sleep
2. Tap “Edit” in the top-right corner
3. Set your Bedtime and Wake Up times
4. Enable “Daily Schedule”
This tells your watch when to expect sleep and when to activate tracking.
Link Sleep Schedule to Sleep Focus
Here’s a critical step most users miss:
1. In the Health app, go to Sleep settings
2. Scroll down to “Sleep Focus”
3. Enable “Use Schedule for Sleep Focus”
⚠️ This setting is off by default—even if Sleep Focus appears active.
Without this toggle, Sleep Focus won’t auto-activate, and temperature tracking won’t begin—no matter how long you wear the watch.
Ensure Sleep Focus Activates Automatically (Not Manually)
Why Manual Activation Doesn’t Work
Multiple user reports confirm: manually turning on Sleep Focus does not trigger wrist temperature tracking. The system requires automatic activation via your sleep schedule.
“I had Sleep Focus set up, but it wasn’t triggering automatically. Only after I enabled the schedule did tracking begin.” — Oapdm104
Even if you wear the watch all night and manually enable Sleep Focus, the watch may ignore the session.
Test Automatic Sleep Focus Activation
To verify:
1. Set a test bedtime (e.g., 10 PM)
2. Wait for Sleep Focus to auto-activate
3. Check your watch face—the Sleep app should appear
If it doesn’t activate, revisit the “Use Schedule for Sleep Focus” setting.
Workaround: Force Re-activation by Manually Disabling
Some users report success with this workaround:
1. Manually turn off Sleep Focus on the watch (not the iPhone) before bed
2. Let it re-activate via your scheduled time
“If I manually disable Sleep Focus on the watch, it always records temp. If I let it expire naturally, I get no data.” — UrbanExtant
This suggests a sync bug between the iPhone and watch.
Sync Focus Settings Between iPhone and Watch
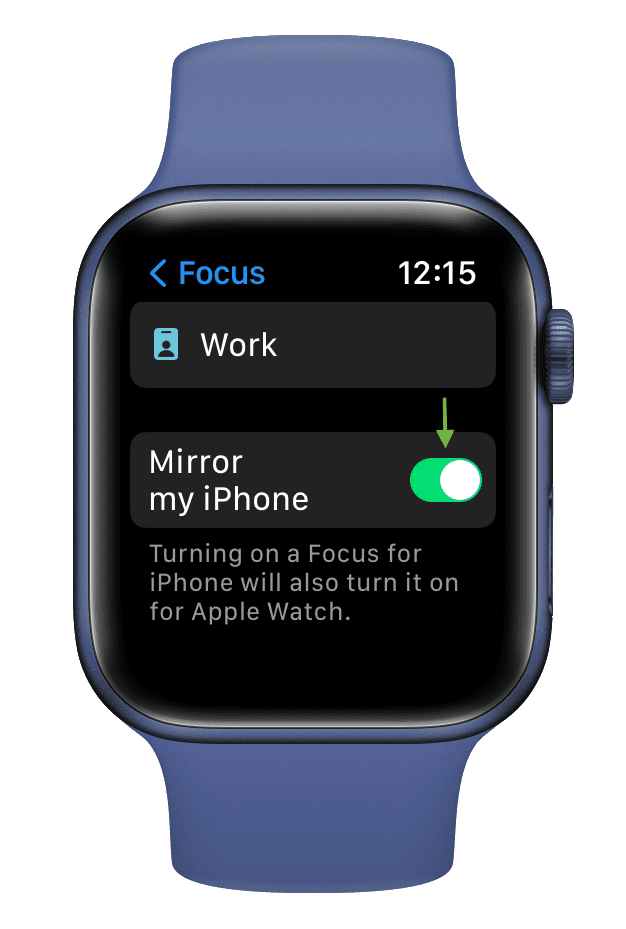
Enable “Mirror iPhone” or “Clone” for Consistency
A hidden but essential setting ensures Focus modes stay in sync:
1. Open the Watch app on your iPhone
2. Go to General > Focus Mode
3. Enable “Clone” (or “Mirror” in US regions)
This ensures that Sleep Focus settings on your iPhone apply to your watch.
“Enabled ‘mirror iPhone’ on my watch—temperature tracking started that night.” — Capital-Timely
This setting can reset after updates or reboots, so check it periodically.
Avoid Conflicting Focus Modes
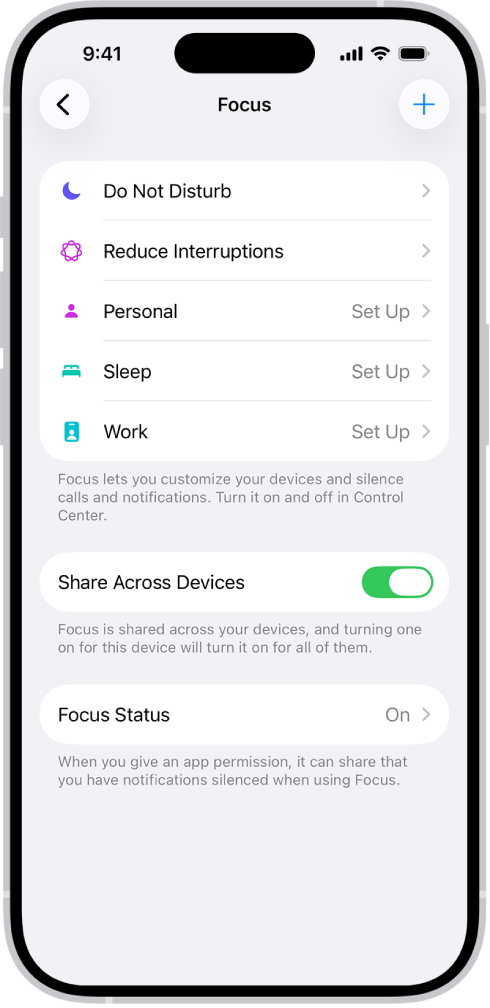
Disable Overlapping Focus Settings
If another Focus (e.g., Do Not Disturb, Work, or a Custom Focus) is active during sleep hours, it can block Sleep Focus from activating.
To prevent conflicts:
1. Open Settings > Focus on your iPhone
2. Review all scheduled Focus modes
3. Ensure no overlaps with your sleep time
Even one conflicting Focus can prevent temperature recording.
Wear Your Apple Watch Properly at Night
Use the Right Band and Fit
The temperature sensor is on the back of the watch and requires skin contact:
– Wear the watch snug but comfortable
– Use the original Apple band or an Apple-certified one
– Avoid thick third-party bands or metal bracelets
“Switched to an aftermarket band—stopped getting readings. Reverted to Apple band—tracking resumed.” — Gman4d3
Remove Cases and Screen Protectors
Apple Support advises:
– Remove any case
– Avoid screen films
– Ensure the back sensors are completely unobstructed
Even thin cases can interfere with thermal readings.
Charge Your Watch Fully Before Bed
Prevent Overnight Shutdown
If the watch dies during sleep, data is lost. Users report increased battery drain under watchOS 11.2:
– Up to 20% overnight (vs. ~7% previously)
To avoid data loss:
– Charge to 100% before bed
– Use Low Power Mode if needed
– Consider charging during short naps
“Battery drains too fast now—died at 3 AM, no data recorded.” — DiFieR
Complete the 5-Night Baseline Requirement
Meet Minimum Sleep Tracking Conditions
You need 5 consecutive nights of valid sleep to see any data:
– Each night: At least 4 hours of sleep
– Sleep must occur within scheduled time
– Sleep Focus must auto-activate
Until then, you’ll see:
– “Needs 5 sleep sessions to establish baseline”
– “No data”
– “More data needed”
“Worn every night since December—still says ‘needs 5 sessions’.” — KittyKatora
This message may persist due to failed auto-activation, not lack of wear.
Troubleshoot Persistent “No Data” Issues
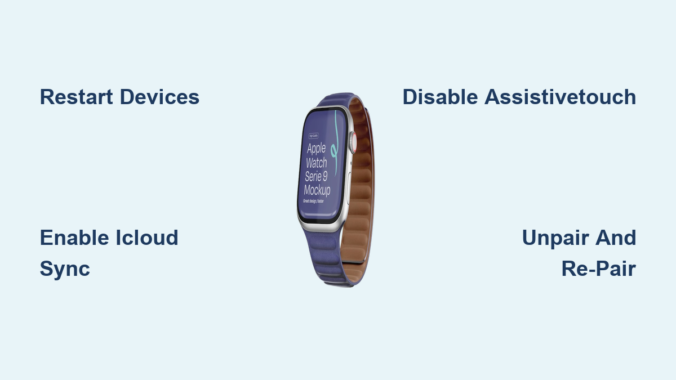
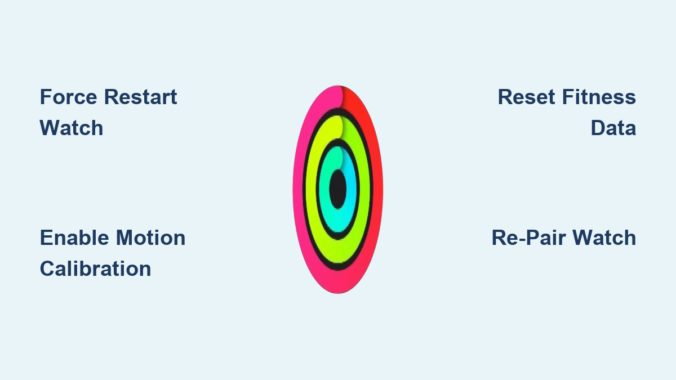
Restart Your Apple Watch
A simple reboot can fix temporary glitches:
1. Press and hold the Side button + Digital Crown
2. Slide to power off
3. Hold the Side button to restart
Try this after adjusting settings.
Delete and Recreate Sleep Focus
Corrupted Focus settings can break tracking:
1. On Apple Watch: Settings > Focus > Sleep Focus
2. Tap Delete
3. Re-create using the + button
4. Re-enable on both watch and iPhone
This forces a clean sync.
Check Wrist Detection
Ensure the watch knows it’s being worn:
1. iPhone > Watch app > Passcode
2. Confirm Wrist Detection is On
If off, the system may assume the watch was removed.
Advanced Fixes for Stubborn Cases
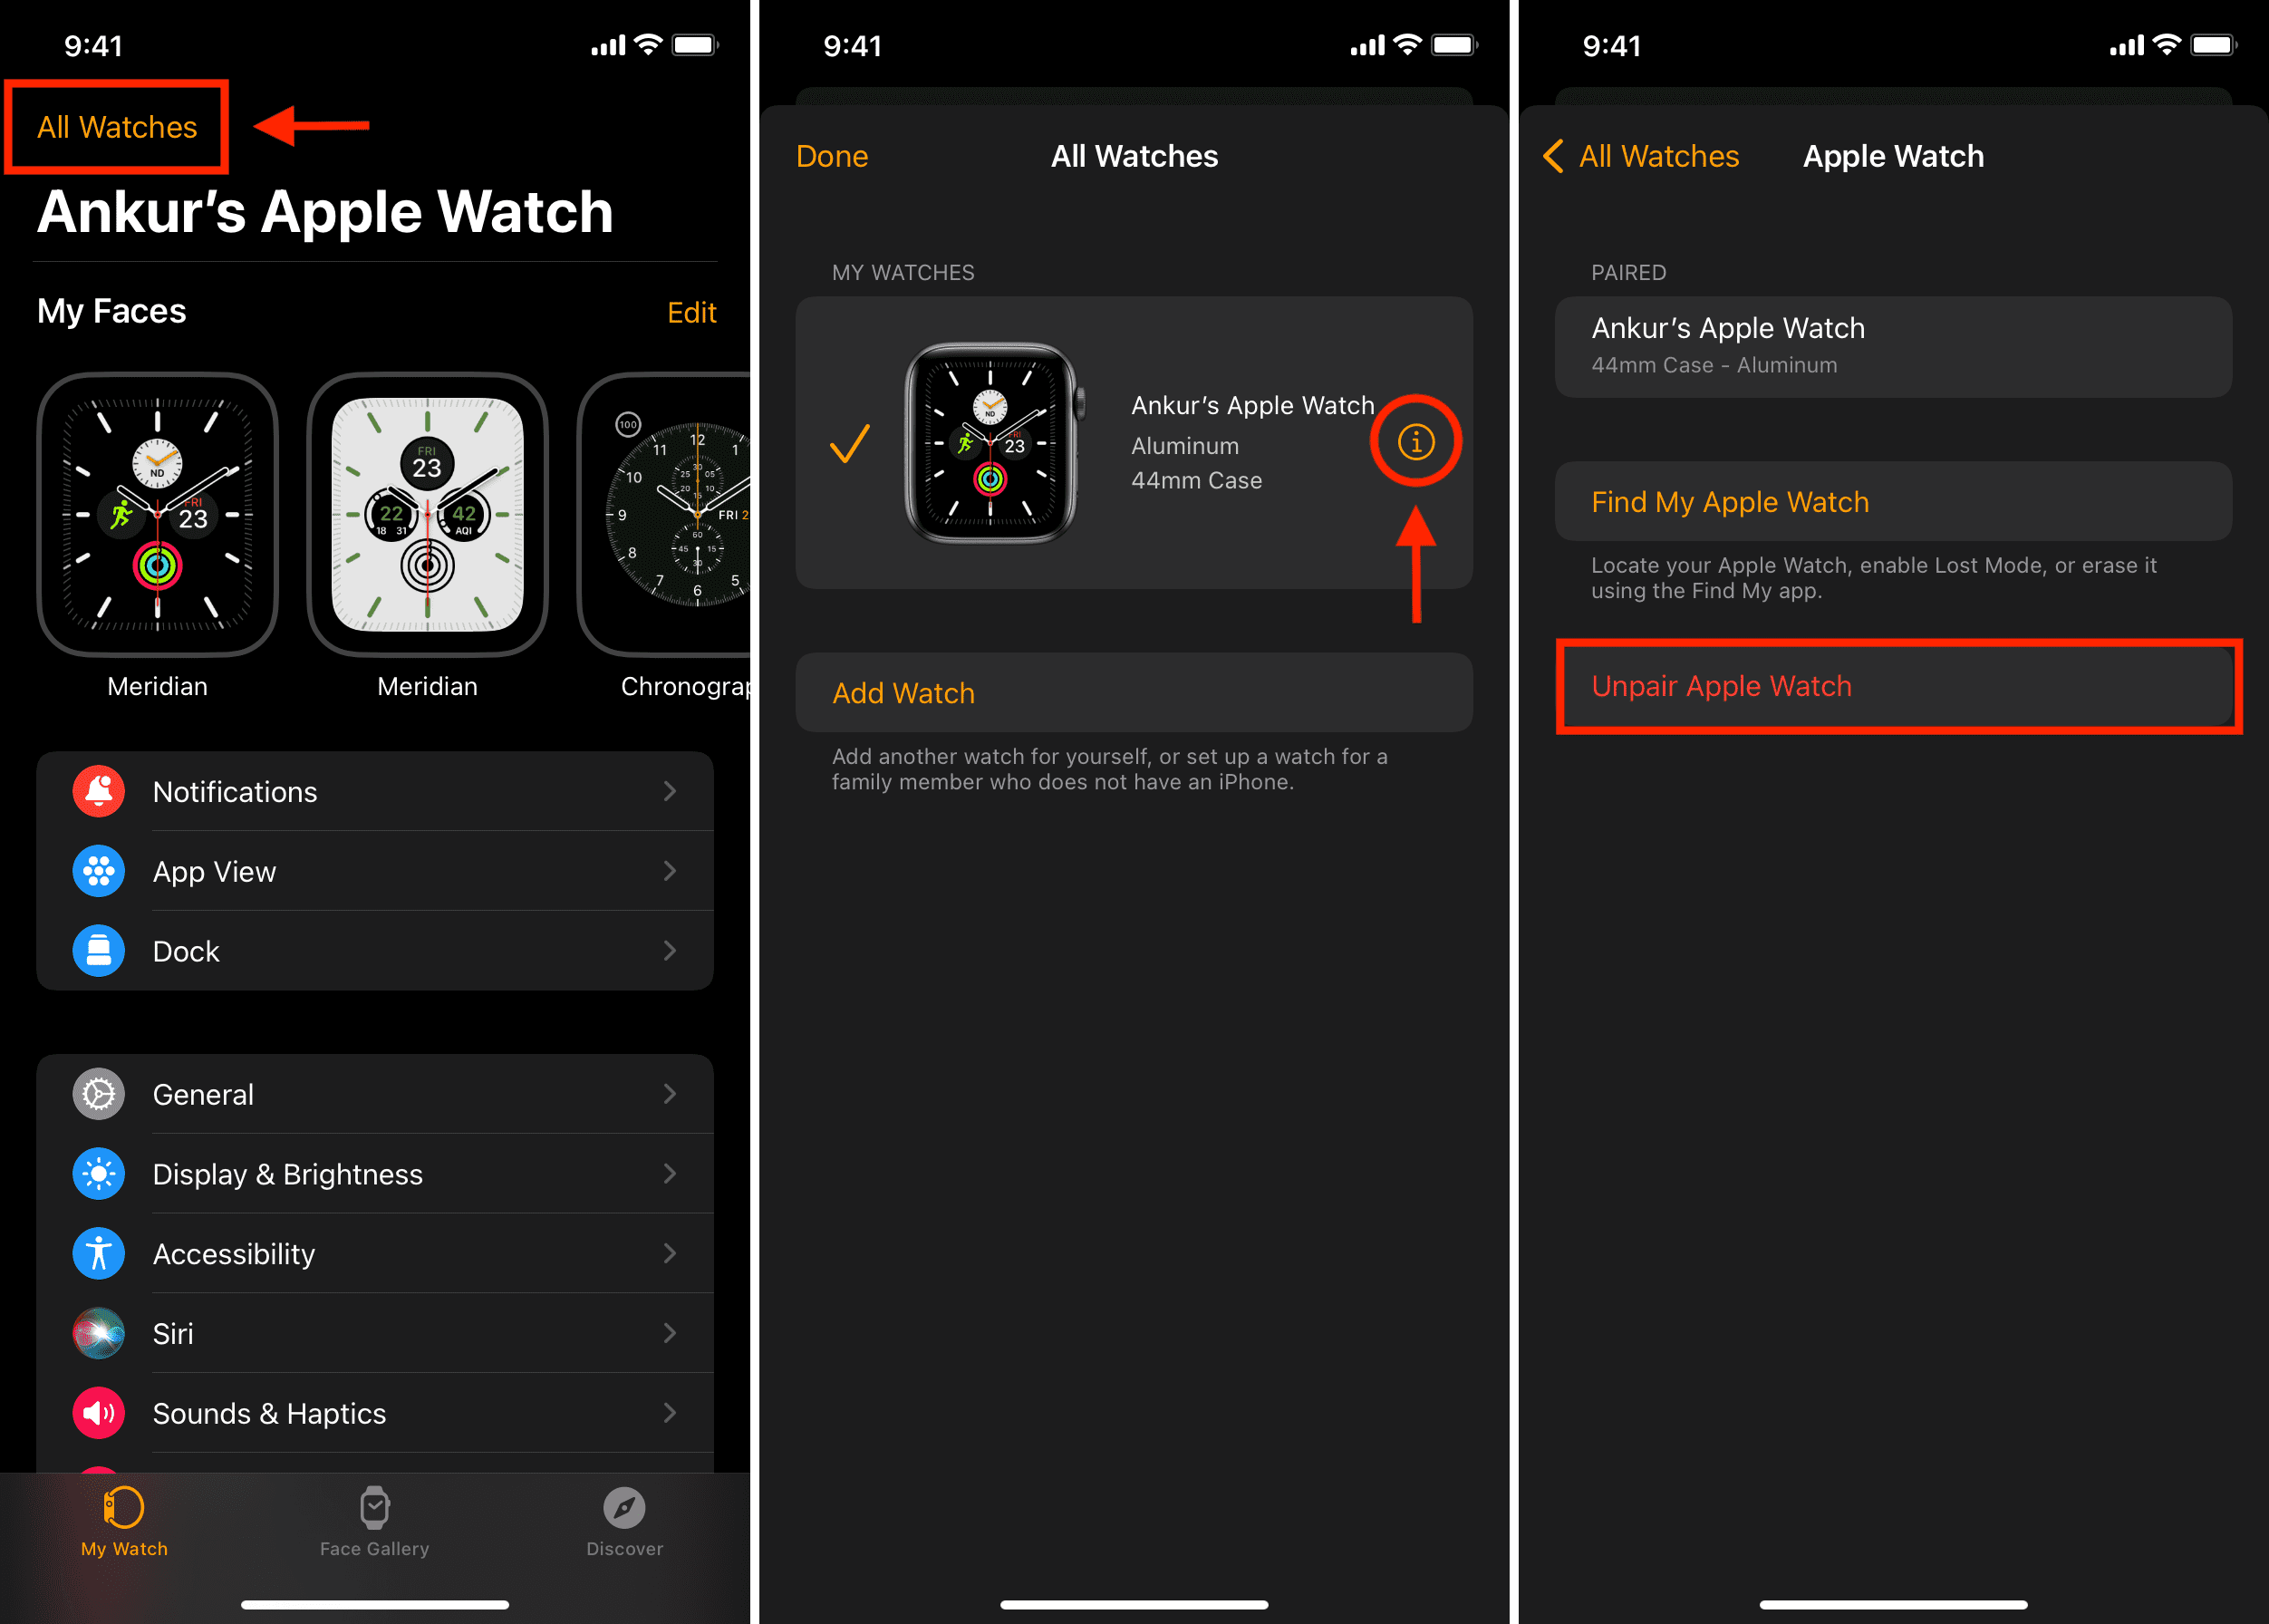
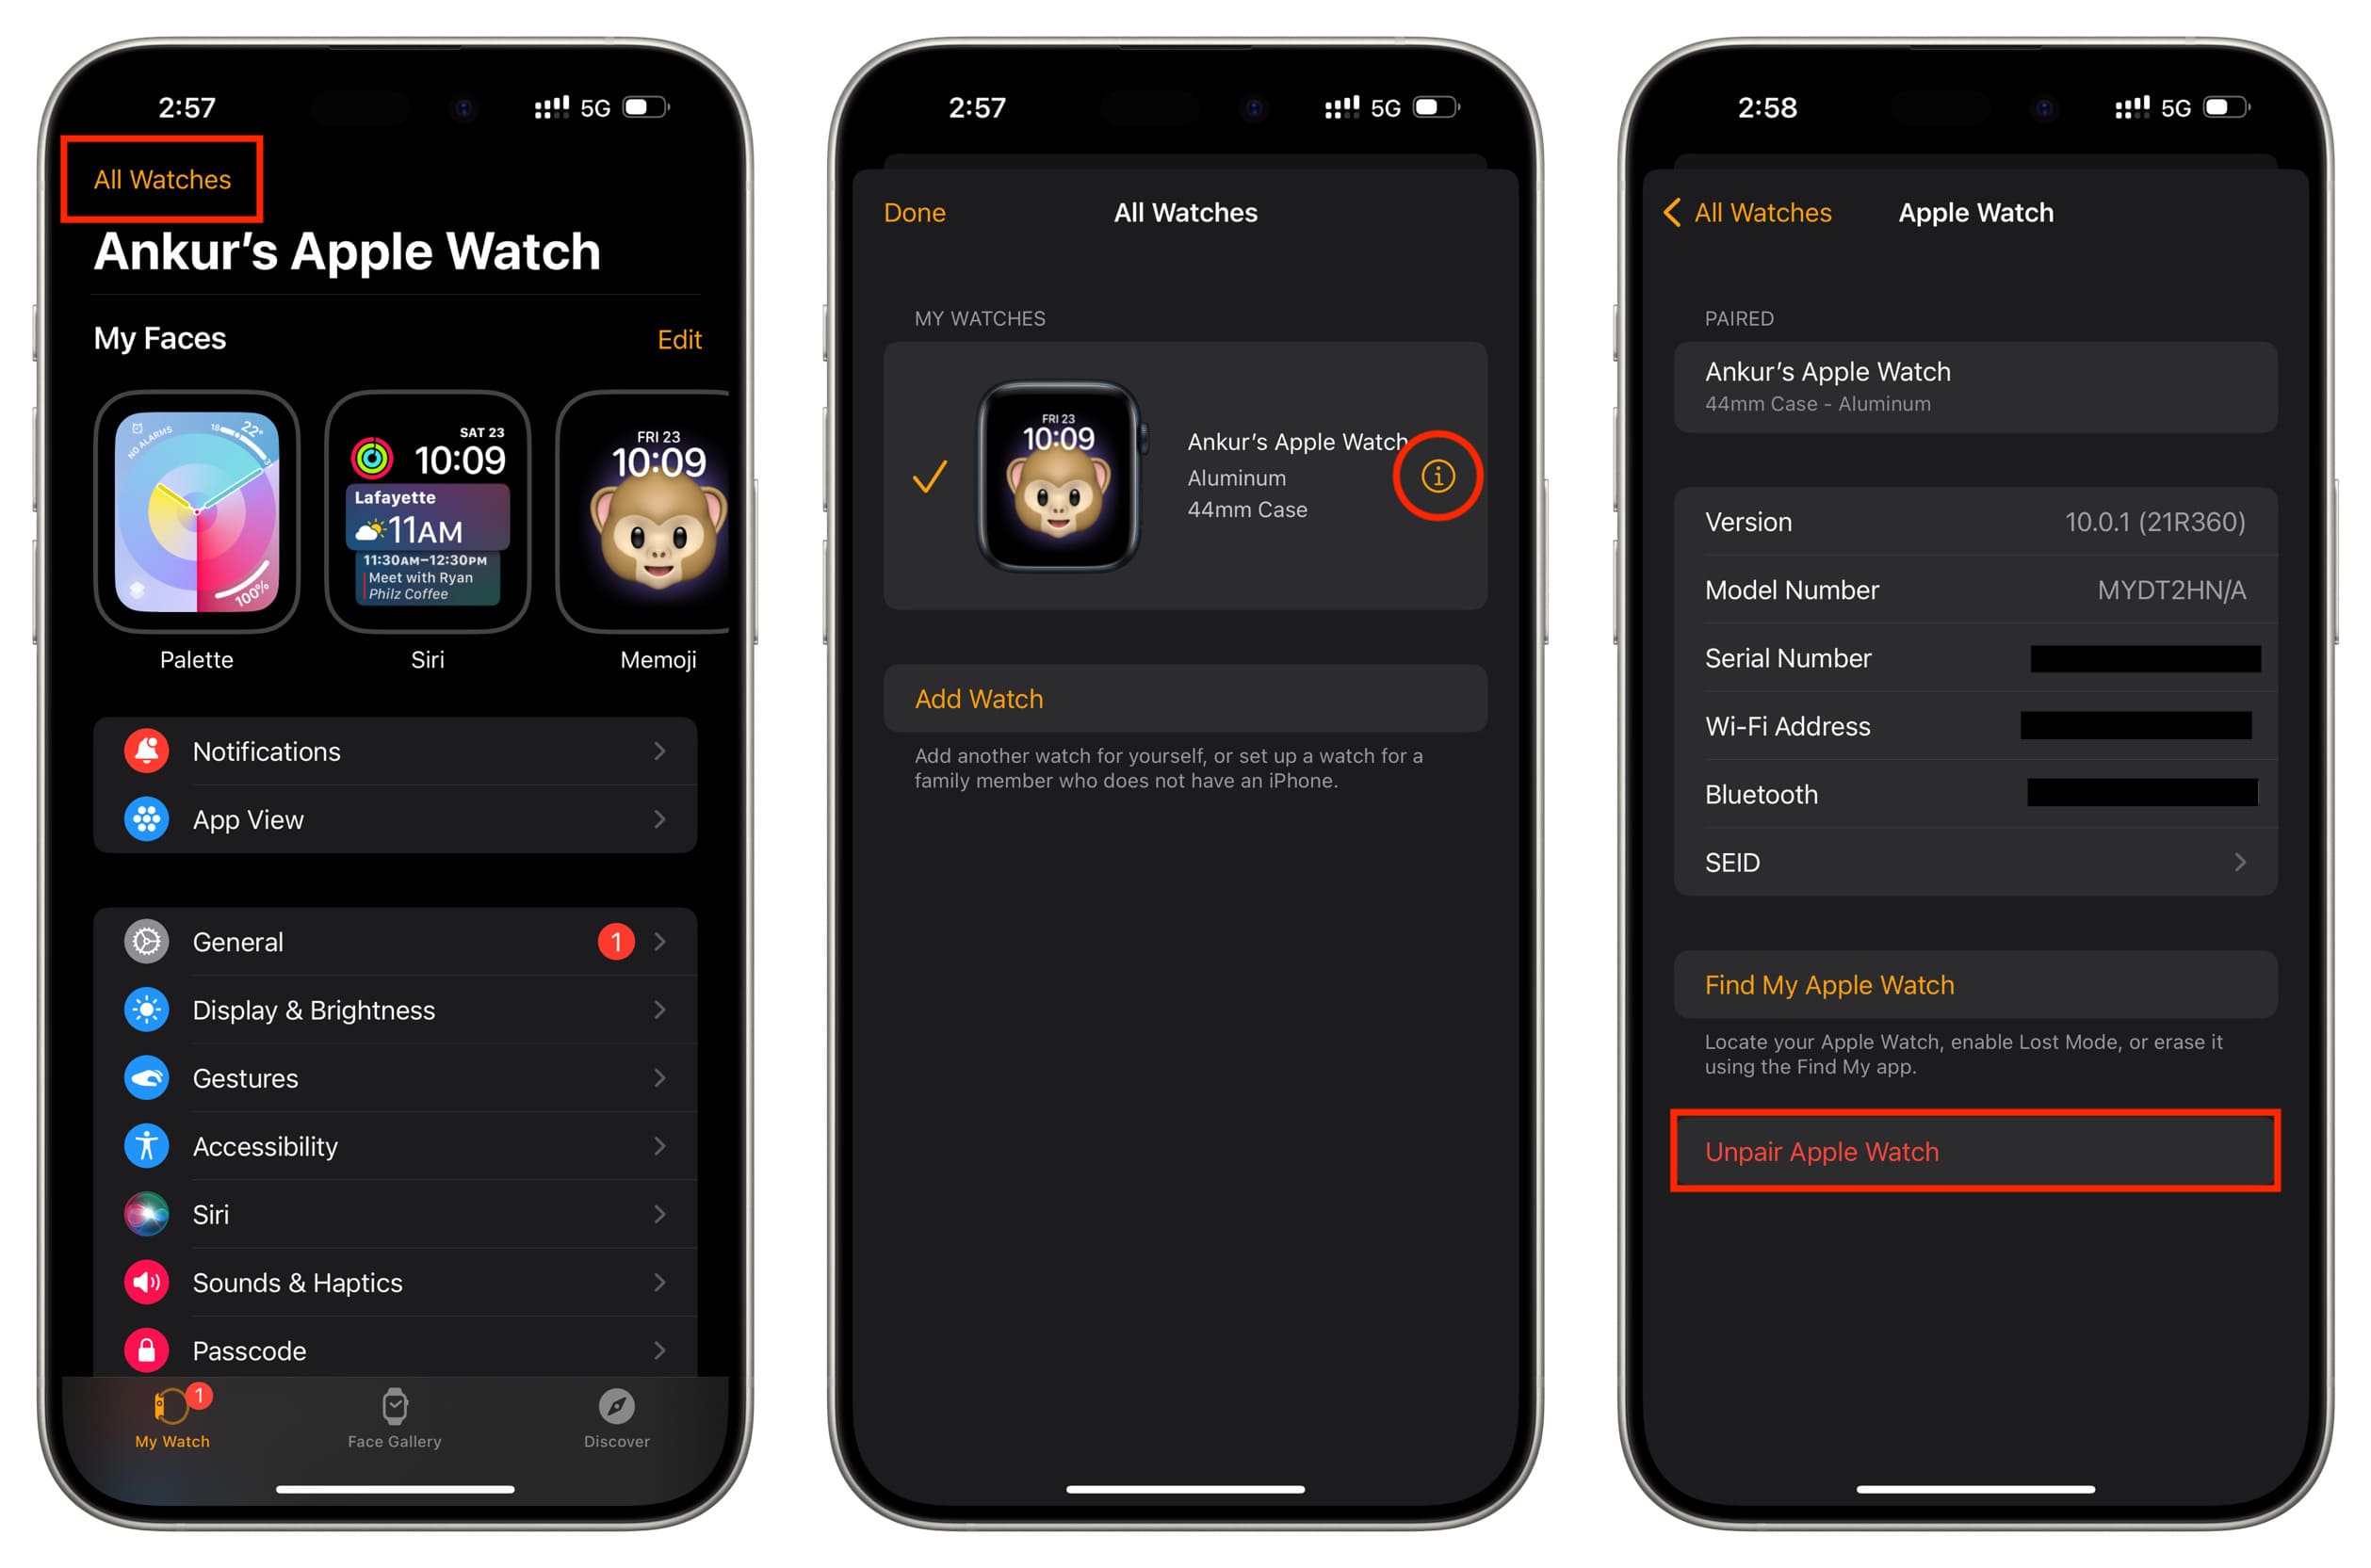
Unpair and Re-pair Your Apple Watch
For deep software issues:
1. Back up your watch
2. Unpair via Watch app > My Watch > Apple Watch
3. Erase all content and settings
4. Re-pair as a replacement device
“After reset, temperature worked the first night.” — Jhawk202
This clears corrupted settings without losing health data.
Reset All Settings on Your iPhone
Sometimes the iPhone side causes sync failure:
1. iPhone: Settings > General > Transfer or Reset iPhone
2. Tap Reset > Reset All Settings
3. Re-enable Focus and Health permissions
This preserves data but resets preferences.
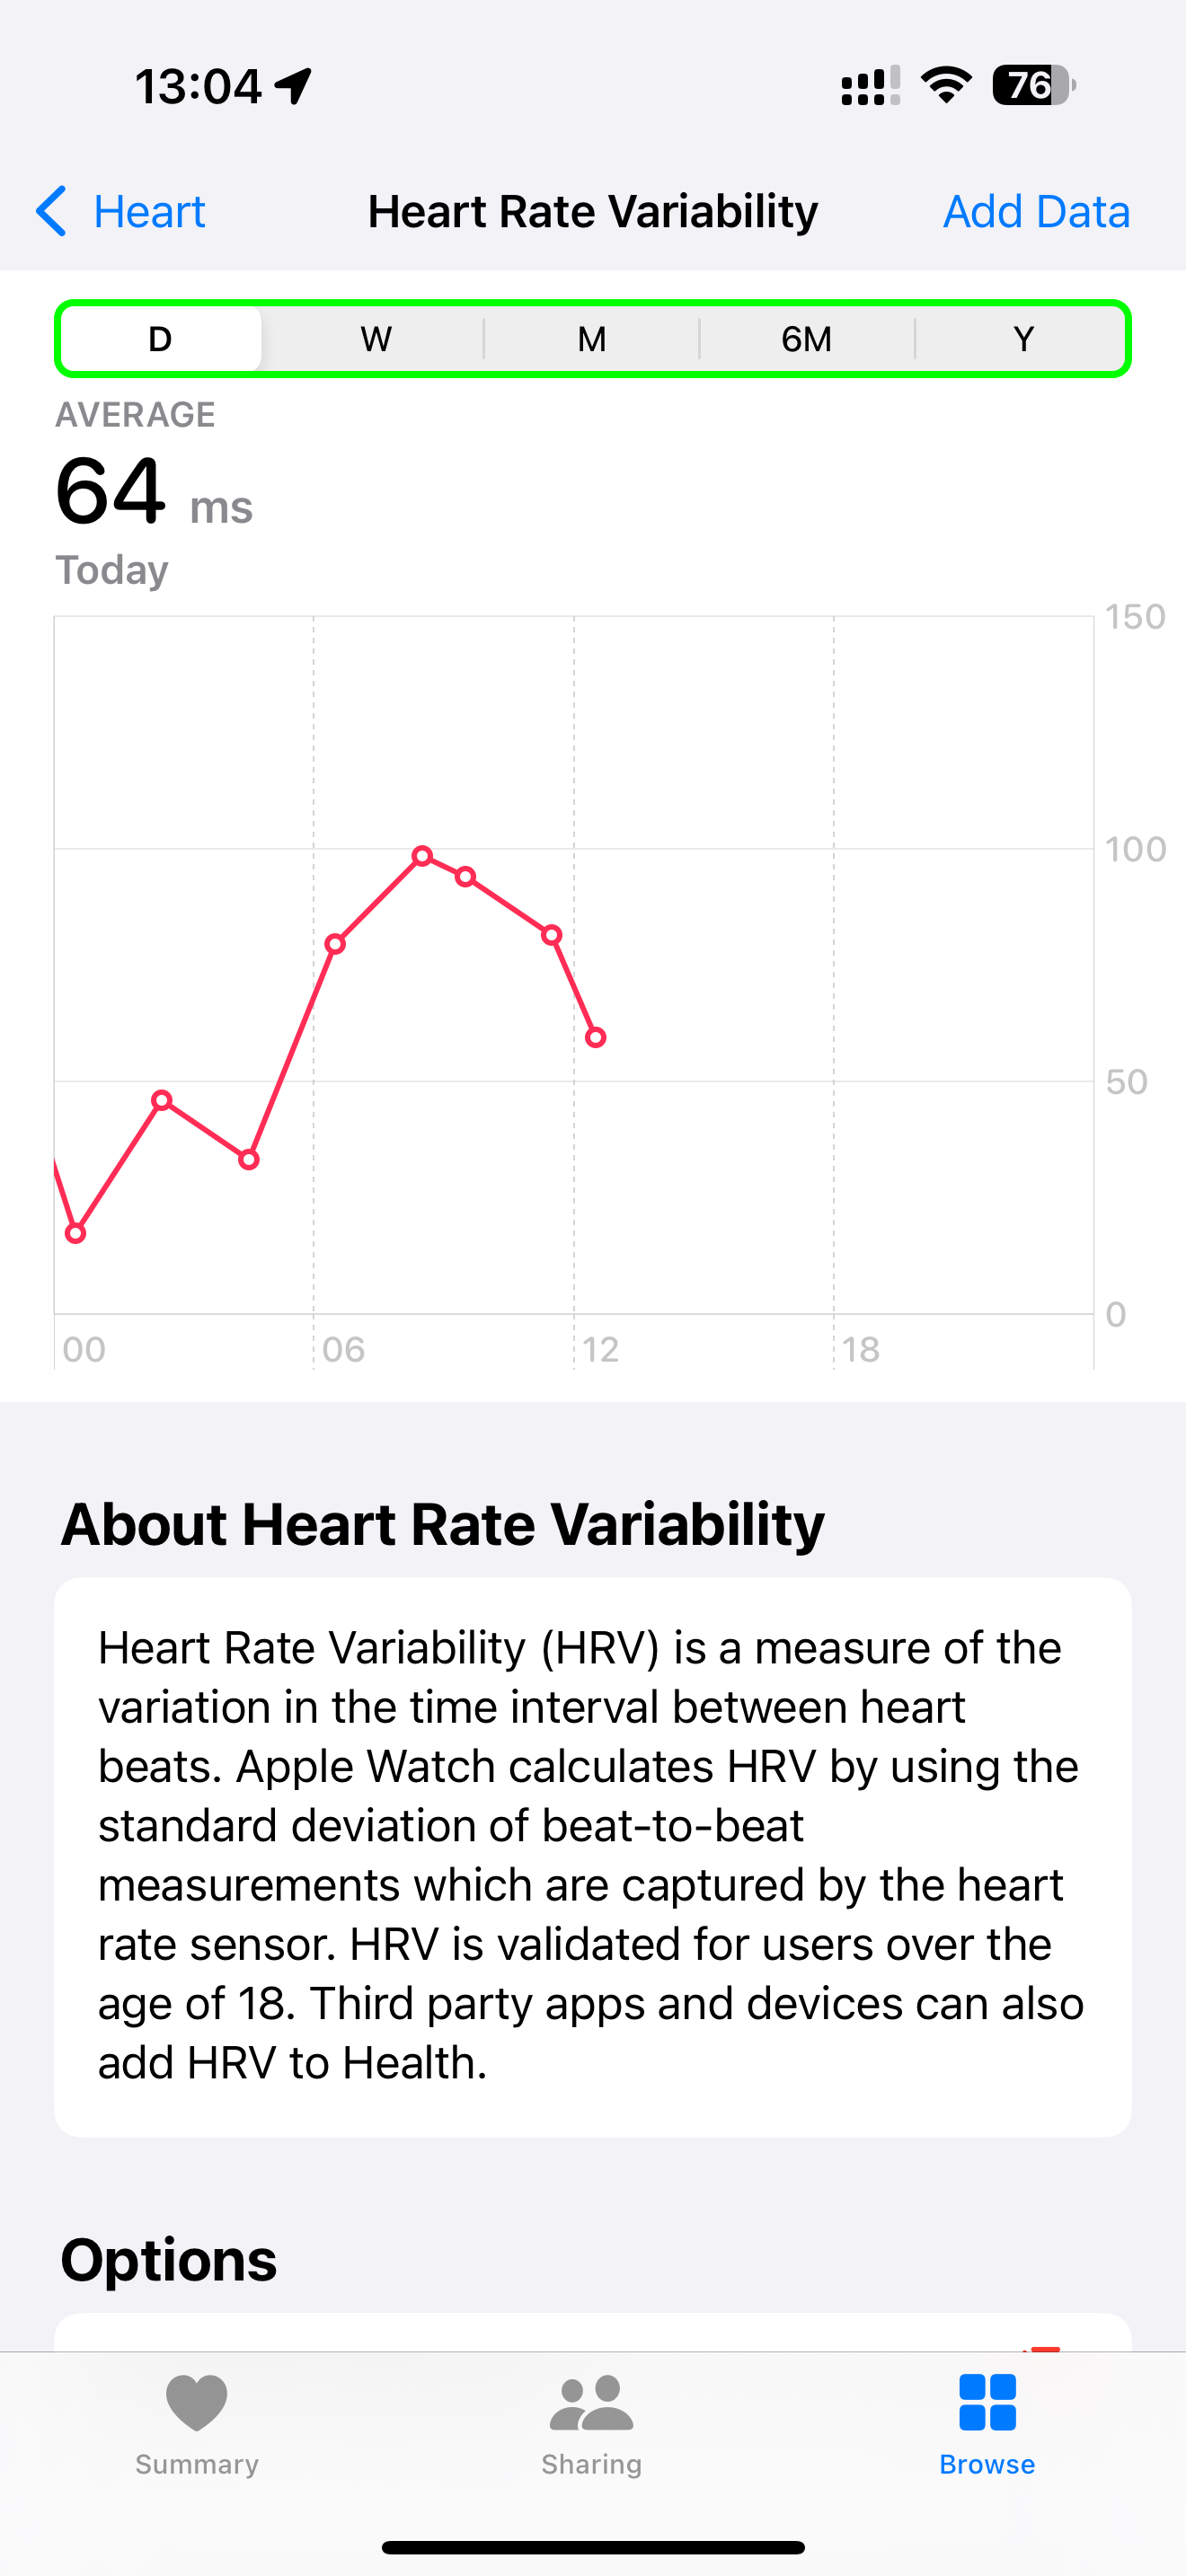
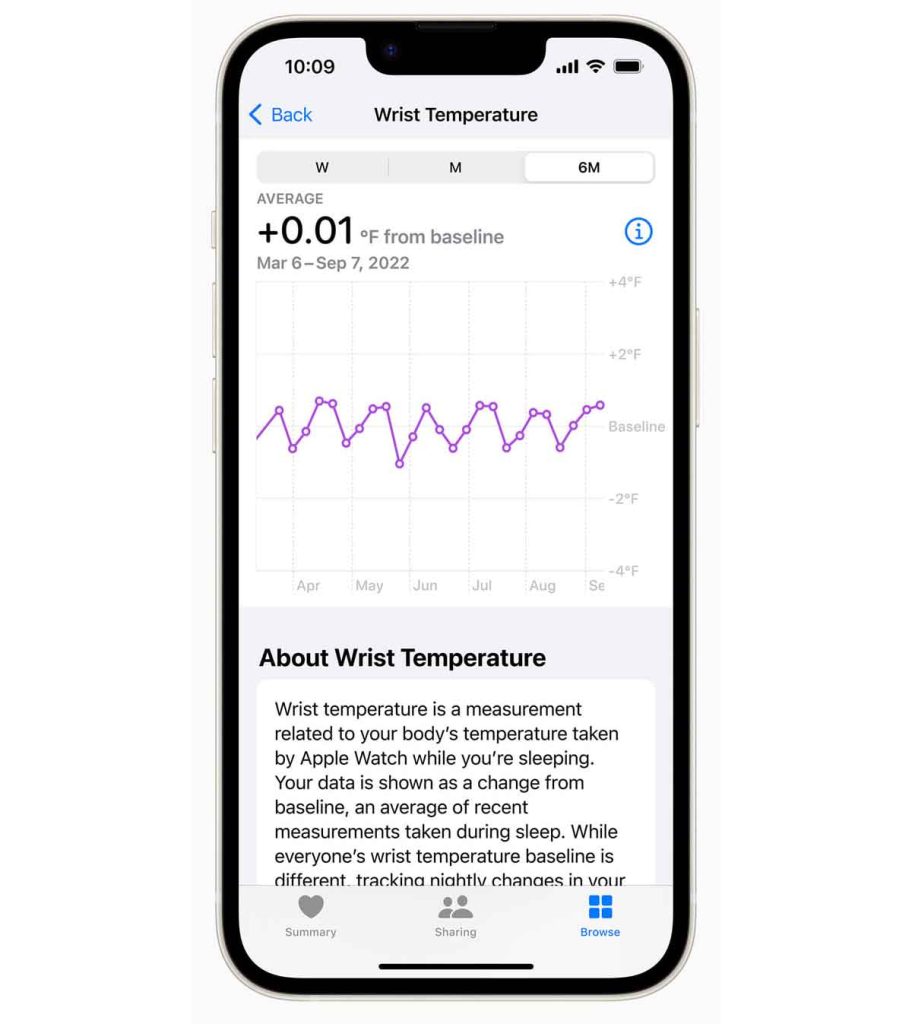
Understand What the Data Actually Means
It’s Not a Real-Time Thermometer
The Apple Watch does not measure core body temperature. Instead, it tracks tiny fluctuations in wrist temperature during sleep to identify trends.
“Absolute wrist temp isn’t useful—it’s too variable. But tracking changes over time can signal illness or ovulation.” — volpeperduta
Data appears as a trend line, not a number.
Data Appears After Baseline
After 5 nights:
1. Open Health app > Browse > Temperature > Wrist Temperature
2. Scroll to “Show All Data”
3. View nightly deviations from baseline
Positive values = warmer than average
Negative = cooler than average
Recognize the Feature’s Limitations
Why Sleep Focus Is Required
Unlike heart rate or blood oxygen, wrist temperature only records during Sleep Focus. Users find this arbitrary:
– “None of the other sensors need Sleep Focus. Why this one?” — Ed31W
Apple likely uses Sleep Focus as a proxy for stable, motionless conditions—but it excludes people with irregular sleep.
Not Suitable for On-Call Workers
If you’re woken by calls or alerts:
– Sleep Focus may end early
– Temperature recording stops
– Baseline progress resets
“As an undertaker, I get calls at night. I can’t miss them—so I disabled Sleep Focus. Now no temp data.” — Ed31W
Apple offers no alternative for partial or interrupted sleep tracking.
Report the Bug to Apple
Use Feedback Assistant
Since the issue affects multiple models post-update, it may be a watchOS 11 bug:
1. Visit feedbackassistant.apple.com
2. Submit: “Wrist Temperature Not Recording Despite Correct Setup”
3. Include:
– Apple Watch model
– watchOS version
– iPhone model and iOS version
– Steps you’ve tried
Contact Apple Support
If nothing works:
– Call Apple Support
– Visit an Apple Store
– Request escalation if frontline support dismisses the issue
Mention that multiple devices are affected—this suggests a systemic bug.
Consider Alternatives
Whoop, Oura, and Garmin Offer Better Tracking
Some users switched from Whoop to Apple Watch, only to return:
“Whoop gives me raw temperature data every night. Apple’s system is too fragile.” — WarholMoncler
Other alternatives:
– Oura Ring
– Garmin watches
– Fitbit Sense 2
These offer more flexible or transparent temperature monitoring.
Final Checklist: Fix Apple Watch 10 Wrist Temperature
✅ Apple Watch Series 10 (supported)
✅ watchOS 9+ (preferably latest)
✅ iOS 16+ on iPhone
✅ Wrist Temperature enabled in Health app
✅ Privacy permission granted in Watch app
✅ Sleep Schedule set in Health app
✅ “Use Schedule for Sleep Focus” enabled
✅ Sleep Focus auto-activates at bedtime
✅ “Mirror iPhone” or “Clone” enabled in Focus settings
✅ No conflicting Focus modes active
✅ Original Apple band, no case or screen protector
✅ Watch worn snugly, charged to 100%
✅ 5+ consecutive nights of 4+ hour sleep with auto Sleep Focus
If all boxes are checked and it still doesn’t work—report the bug to Apple. You’ve done everything right.
Final Note: The Apple Watch 10 wrist temperature feature is powerful when it works—but its reliance on automatic Sleep Focus and strict scheduling makes it fragile. Until Apple removes unnecessary dependencies or fixes the watchOS 11 bug, many users will remain locked out of a feature they paid for. For now, follow this guide to maximize your chances of success—and keep pressure on Apple to improve it.