If you’ve ever tried to squeeze into a group photo only to realize the camera’s out of reach, your Apple Watch might already have the fix. Despite common misconceptions, the Apple Watch doesn’t have a built-in camera—but it turns your wrist into a powerful remote control for your iPhone’s camera. Using the pre-installed Camera Remote app, you can see a live preview, snap photos, record videos, adjust settings, and even delete shots—all without touching your phone.
This feature is available on every Apple Watch Series 3 and later, yet many users overlook it due to inconsistent performance or confusion about setup. When used correctly, however, the Camera Remote app becomes an essential tool for hands-free photography, whether you’re capturing family memories, filming vlogs, or snapping the perfect pet photo. In this guide, you’ll learn exactly how to use Apple Watch as a camera remote, troubleshoot common problems, and adopt best practices to ensure it works every time.
Launch Camera Remote from Your Watch
The first step is opening the right app—quickly and reliably.
Tap the Camera App on the Home Screen
- Press the Digital Crown to return to your Apple Watch home grid.
- Find and tap the Camera icon, labeled “Camera Remote” in some versions.
- Wait a few seconds for the live feed to appear.
First-time users may see a prompt on their iPhone asking to allow pairing. Tap Allow to enable the connection.
Use the Smart Stack for Instant Access
- Swipe up from your watch face to open the Smart Stack.
- Look for the Camera Remote suggestion, which often appears after recent camera use.
- Tap it to jump straight into the live preview.
This widget-based shortcut saves time and is especially useful when setting up spontaneous shots.
Activate with Siri Voice Commands
Say: “Hey Siri, take a picture”
– This command launches the Camera Remote app and triggers a photo after a 3-second delay.
– Ideal when your hands are full or you’re already in position.
Pro tip: To open the app without taking a photo, say “Open Camera Remote” instead.
See the iPhone’s Live Camera Feed on Your Watch
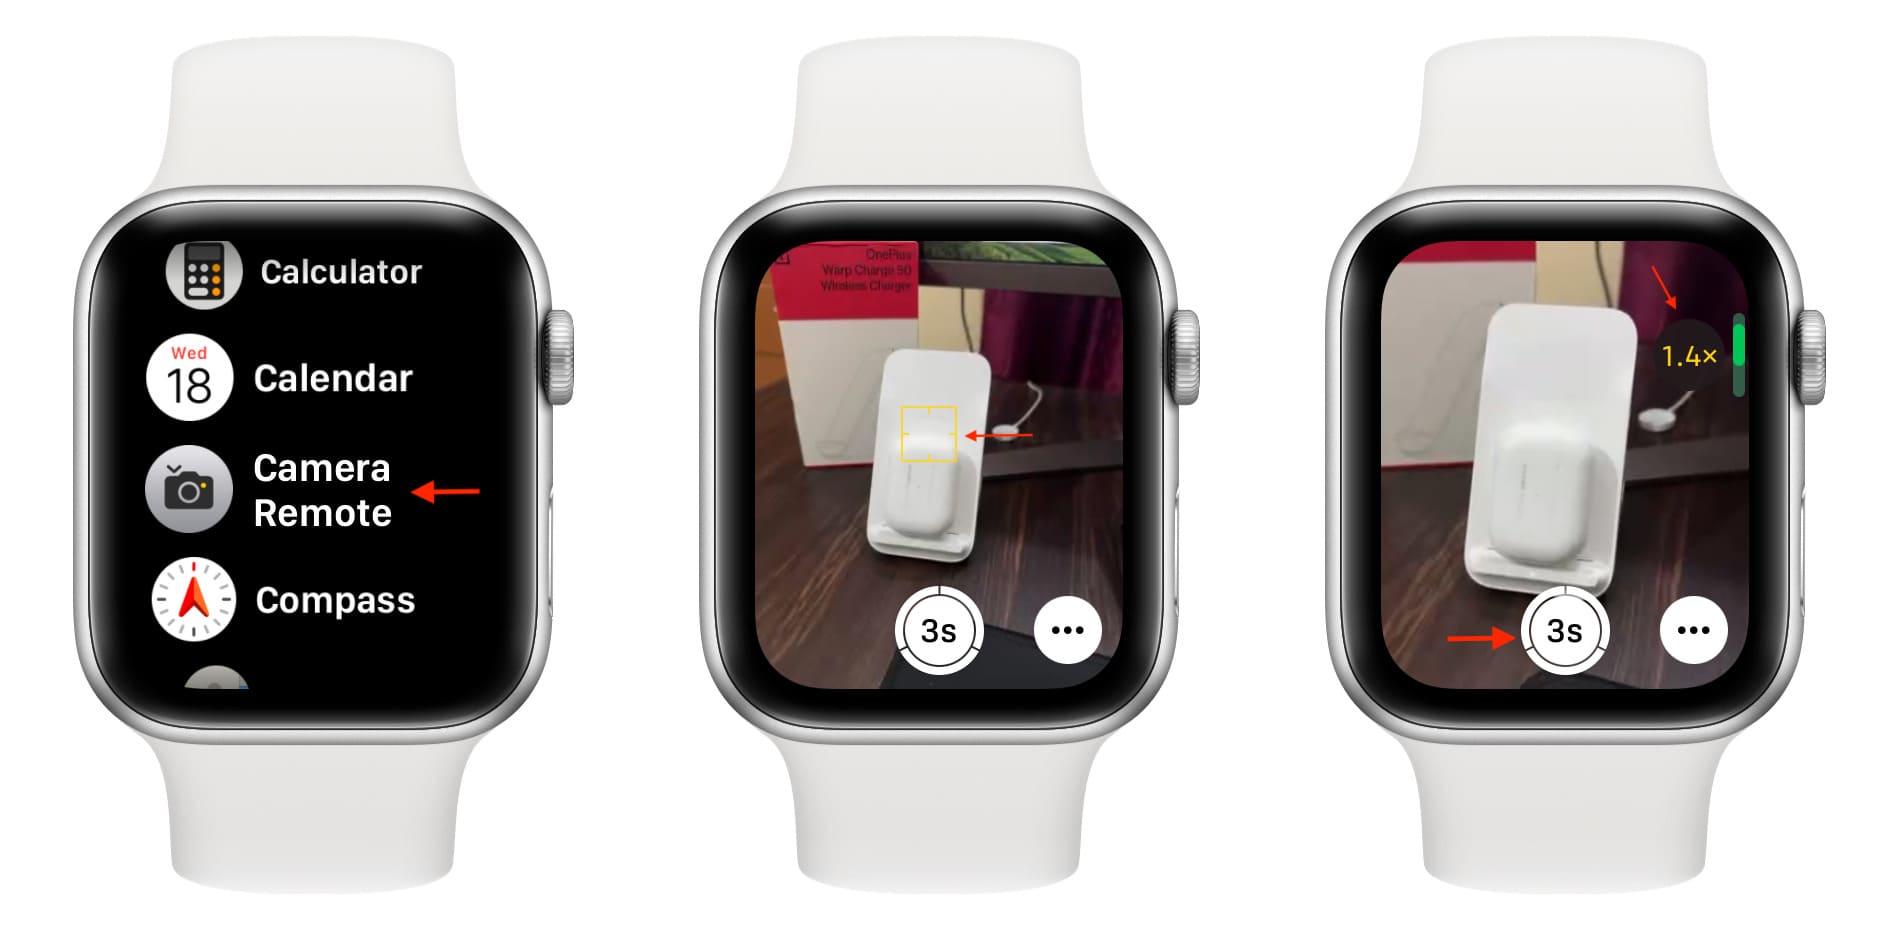
Once launched, your Apple Watch becomes a real-time viewfinder.
Ensure a Stable Connection
- A black screen usually means the iPhone is locked or the Camera app failed to open.
- The iPhone must be unlocked and within Bluetooth range (up to 33 feet).
- Set Auto-Lock to 1 minute or longer in Settings > Display & Brightness on your iPhone to prevent disconnection.
Many users report that reducing Auto-Lock to 30 seconds causes the feed to drop. Extending it fixes the issue.
Frame Your Shot Remotely
- Place your iPhone on a tripod, shelf, or stable surface.
- Use the watch screen to adjust the angle and composition.
- Confirm lighting, focus, and subject placement before capturing.
The live feed updates in real time, so you can fine-tune your setup from across the room—perfect for group photos or creative angles.
Take Photos from Your Wrist
With the live preview active, capturing images is simple and intuitive.
Tap to Snap a Photo
- Tap the large circular shutter button at the bottom of the screen.
- By default, a 3-second timer starts, giving you time to get into the shot.
Customize the Timer
- Tap the clock icon to change the delay.
- Choose from:
– Off (instant capture)
– 3 seconds
– 10 seconds
Use the 10-second timer for large group shots or complex poses.
Use Siri for Hands-Free Photos
Say: “Hey Siri, take a photo”
– Works even if the Camera Remote app isn’t open.
– Great for spontaneous moments when you’re mid-action.
Record Videos Without Touching Your iPhone
You can start and stop video recording entirely from your wrist.
Start Video Recording
- Open Camera Remote and frame your scene.
- Touch and hold the shutter button to begin recording.
– A red recording indicator appears on both devices.
Stop and Save
- Tap the screen to stop recording.
- The video saves automatically to your iPhone’s Photos app, typically in HEVC format for space efficiency.
Audio is captured by the iPhone’s microphone, not the Apple Watch, so position the phone close to the sound source.
Zoom Using the Digital Crown

Adjust your framing without moving the iPhone.
Zoom In or Out
- Rotate the Digital Crown up to zoom in, down to zoom out.
- Works in both photo and video modes.
- The zoom level reflects your iPhone’s optical and digital capabilities.
Smooth zooming lets you create cinematic effects or fine-tune framing during a vlog.
Switch Between Front and Rear Cameras
Change perspectives without touching your phone.
Flip Cameras Instantly
- Tap the camera switch icon (two arrows forming a circle).
- The live feed updates to show either the front (selfie) or rear (main) camera.
Use the front camera for self-portraits or the rear for higher-resolution group shots.
Control Flash Settings from Your Wrist
Adjust lighting without walking back to your iPhone.
Set Flash Mode
- Tap the lightning bolt icon.
- Choose:
– Auto: Flash fires only if lighting is low.
– On: Flash activates with every shot.
– Off: Flash disabled.
This is especially useful when setting up low-light shots or avoiding harsh flash in natural settings.
Turn Live Photos On or Off
Capture motion and sound—or keep it still.
Toggle Live Photos
- Tap the three concentric circles icon.
- Switch Live Photos on or off.
– When enabled, 1.5 seconds of motion and audio are saved before and after the shot.
Live Photos can be edited later on your iPhone—turned into loops, bounces, or stills.
Review and Delete Recent Captures
Check your shots and clean up mistakes—all from your wrist.
View the Last Photo or Video
- Tap the thumbnail in the bottom-left corner.
- Swipe left or right to browse recent captures.
Delete a Mistake
- Open the image or video in full screen.
- Tap the trash can icon.
- Confirm deletion—removed from both devices.
Only the most recent few captures appear here. Older media must be reviewed on the iPhone.
Fix Common Camera Remote Issues
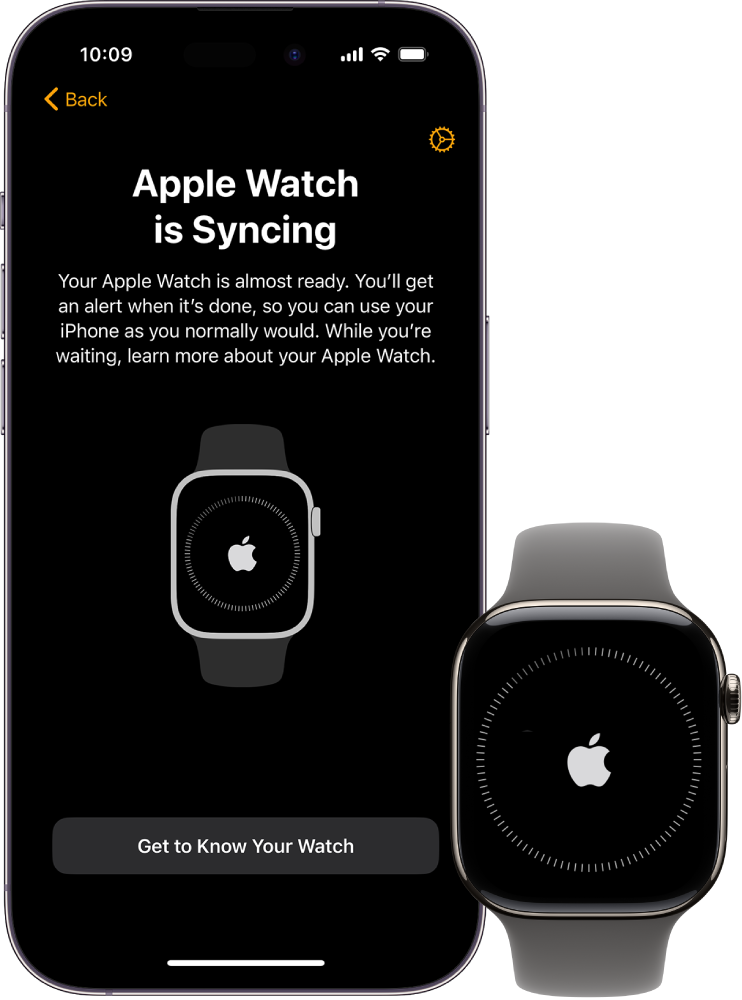
Even with proper setup, many users experience connection problems.
Black Screen on Watch?
Cause: iPhone is Locked
- The Camera Remote fails if the iPhone is asleep or locked.
Solution:
– Unlock your iPhone first—never start from the lock screen.
– Set Auto-Lock to 1 minute or longer.
“Fixed mine by changing Auto-Lock to 1 minute. Seems small, but it worked.” — maximo61170
App Won’t Connect?
Try These Fixes:
Restart Devices
– Restart both iPhone and Apple Watch.
– Some users find restarting just the watch resolves the issue.
Reset Sync Data
1. On iPhone, open the Apple Watch app.
2. Go to General > Reset > Reset Sync Data.
3. Wait for re-sync—often restores Camera Remote.
“Reset Sync Data fixes it every time—for a while.” — r-k-f
Follow Correct Launch Order
– Always open Camera Remote on the watch first.
– Let it auto-launch the iPhone camera.
– Avoid opening the iPhone camera manually.
“I open the remote on my watch, and it magically opens the camera on my phone.” — Bobbybino
Force Close iPhone Camera
1. Swipe up on the Camera app to close it.
2. Reopen Camera Remote on the watch.
Weak or Unstable Connection?
Improve Signal
- Enable Wi-Fi on Apple Watch (Settings > Wi-Fi).
- Wi-Fi boosts streaming stability, even with Bluetooth.
- Keep devices within 10 meters (33 feet) and in line of sight.
- Avoid interference from microwaves, thick walls, or crowded networks.
“Turn on Wi-Fi in your watch. That’s what made it work for me.” — Delgas
Best Practices for Reliable Performance
Follow these habits to make Camera Remote work consistently.
✅ Unlock iPhone first
✅ Set Auto-Lock to 1+ minute
✅ Enable Wi-Fi on Apple Watch
✅ Open app on watch before touching iPhone
✅ Use a tripod
✅ Restart weekly
✅ Reset Sync Data when needed
✅ Avoid lock screen camera access
Users who follow this checklist report success rates above 90%.
Compatible Devices and Requirements
| Device | Requirement |
|---|---|
| Apple Watch | Series 3 or later (watchOS 4.0+) |
| iPhone | iPhone 6s or later (iOS 11+) |
| Connection | Bluetooth LE + Wi-Fi recommended |
| Range | Up to 33 feet (10 meters) |
Newer models (Series 8, Ultra, iPhone 14/15) offer faster response and better video streaming.
Practical Use Cases
Group Photos
- Mount iPhone on a shelf.
- Use the watch to frame everyone.
- Trigger with timer to join the shot.
Self-Portraits & Vlogs
- Use front camera with live preview.
- Record hands-free with: “Hey Siri, record a video.”
Pet and Wildlife Shots
- Place iPhone near pet’s favorite spot.
- Trigger remotely to avoid scaring them.
Hands-Free Documentation
- Say “Hey Siri, take a picture” while cooking or crafting.
Time-Lapse Setup
- Position iPhone, start time-lapse manually, then step away.
- Use watch to monitor framing.
Why It Sometimes Fails
Despite being a native Apple feature, many users report intermittent performance.
Known Limitations
- No official support for lock screen use
- Software bug across generations
- Unreliable auto-launch
- No updates in years
“This has been broken for years. No definitive fix.” — Brisco1
While frustrating, most issues are avoidable with correct usage habits.
Maximize Your Apple Watch Camera Remote
The Camera Remote app is one of Apple’s most underrated features. It combines convenience, creativity, and futuristic appeal—letting you control your iPhone’s camera from your wrist.
Though plagued by occasional bugs, following the right steps—unlocking your iPhone, managing Auto-Lock, using Wi-Fi, and launching in the correct order—makes it work reliably in most situations.
With a little practice, your Apple Watch becomes more than a timepiece—it becomes your personal remote photographer.